4 Tips for Processing Black and White Landscapes

Post processing is an important part of creating compelling black and white landscape photography. Starting with a RAW image that has a wide range of tones and varied textures will give an image a good start but the editing process will bring polish to the image. Creating a black and white image is more than simply hitting a button in Lightroom to remove the color. There are several steps I take to ensure my black and white landscapes have a nice distinction between tones across the histogram.

1) To start, I ensure the image has a white and black point, stretching the tones to the edges of the histogram. The ensures a full range of luminosity values through the image. The one situation where I don’t do this is when I’m going for a lower contrast black and white.

2) The HSL panel in Lightroom or ACR is extremely helpful for working with individuals colors in the image to increase micro contrast in sections of the landscape. For example, darkening the blue channel will darken the tones in a blue sky.  Raising the luminosity of yellow and orange will lighten up grasses or flowers of a foreground. 

3) Dodging and burning is one of the most important tools in black and white photography. Gently brightening light midtones and burning slightly darker ones will create distinction in those shades of gray between black and white.This technique will enhance the light and shadow play in your images as well as bring out the details in nature’s textures. Dodging and burning can be done in any editing program you use. 

Lightroom’s new masking options now offer additional power for selectively dodging and burning specific tones within an image. The Color Range and Luminance Range masks allow you create a panel of adjustments to specific tonal pixels within your image. 

In Photoshop, I love to use Tony Kuyper’s Luminosity Mask actions to isolate particular tones and luminosity values for dodging and burning. These masks offer so many options to control which luminosity values you are adjusting. 

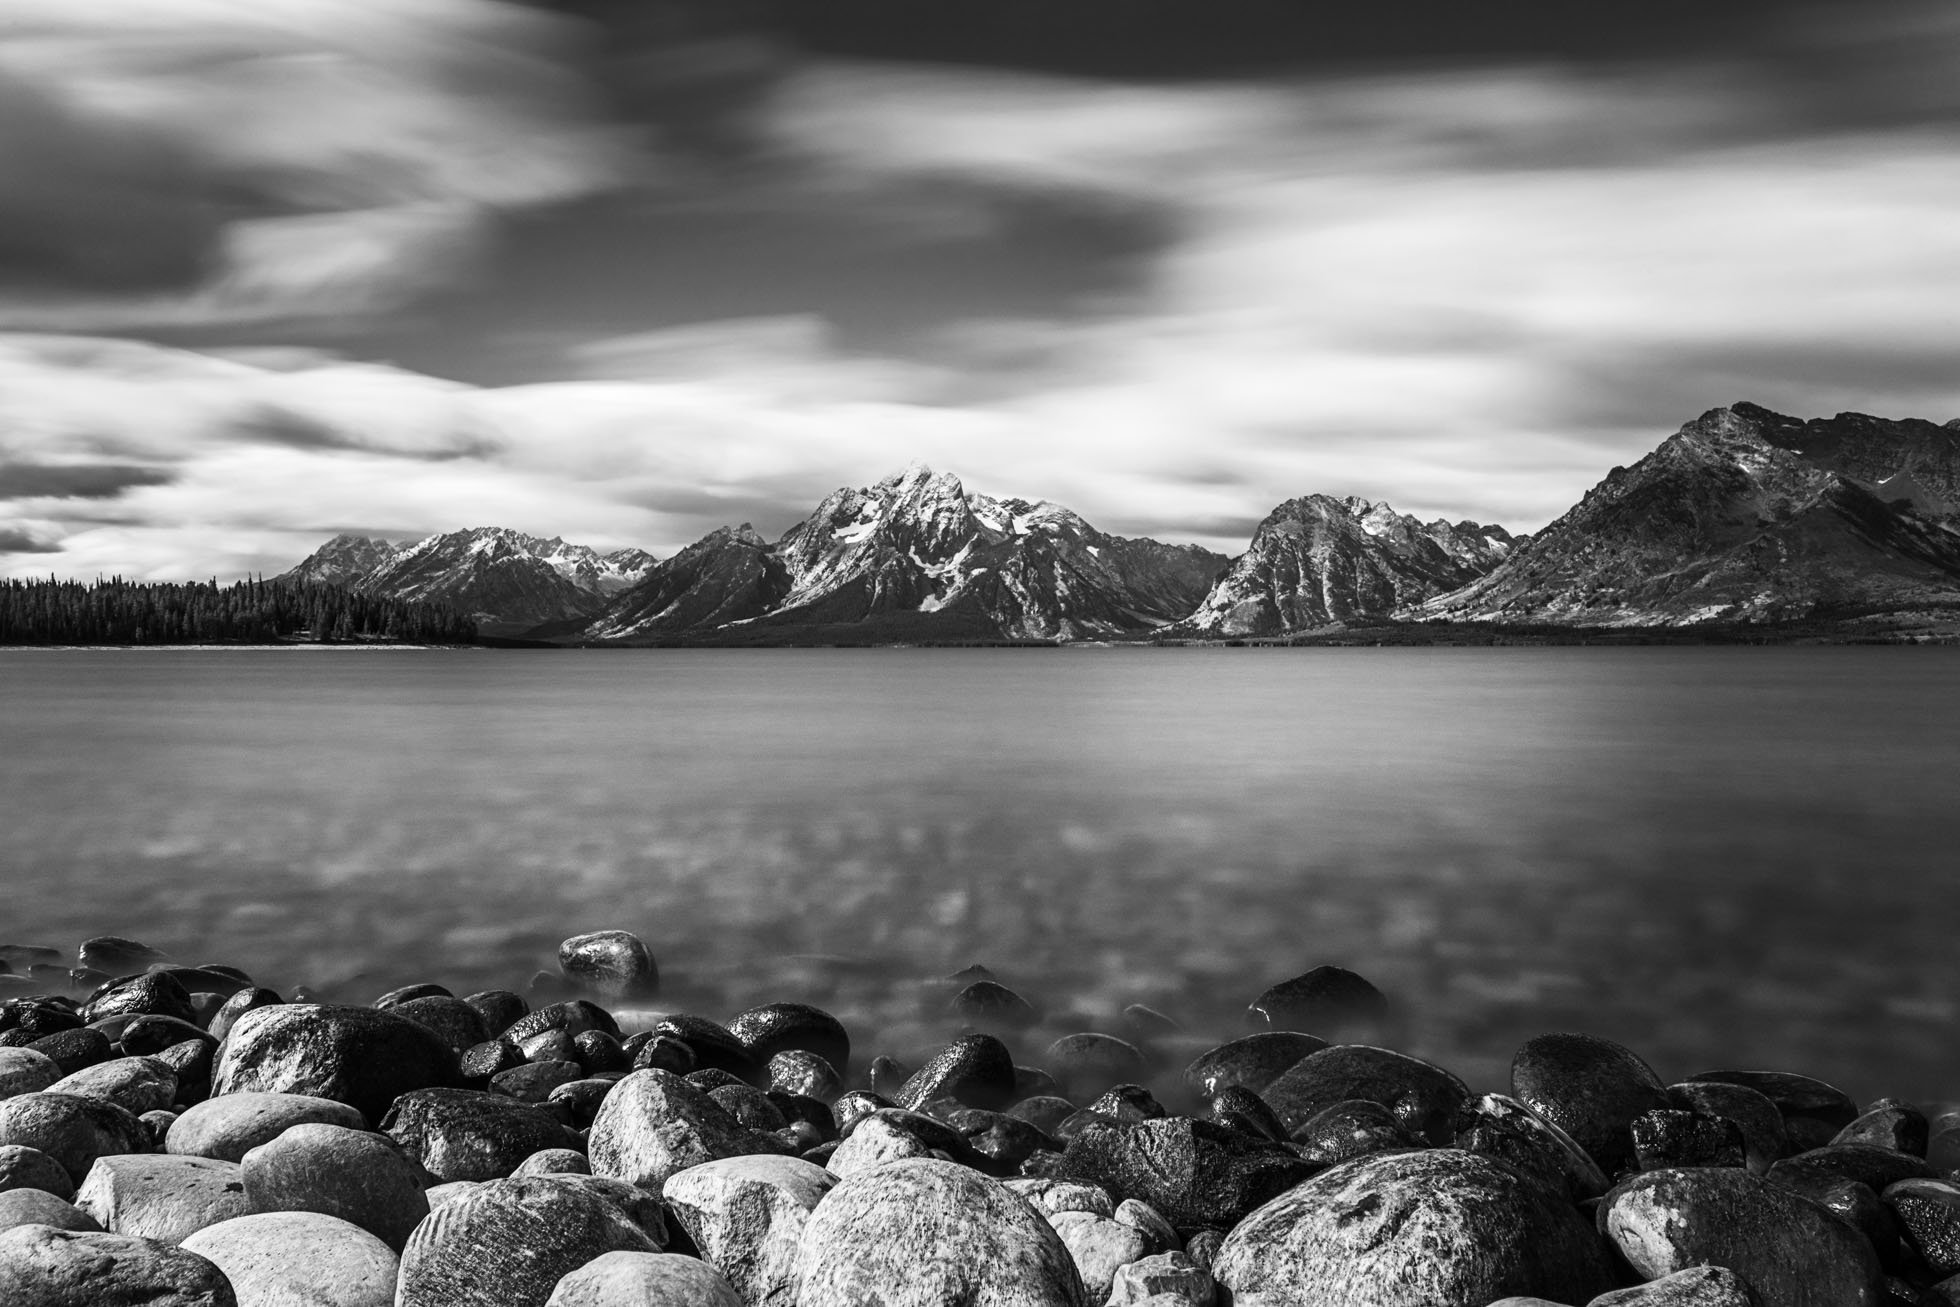
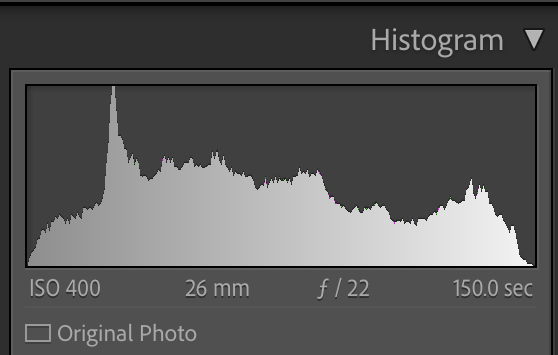
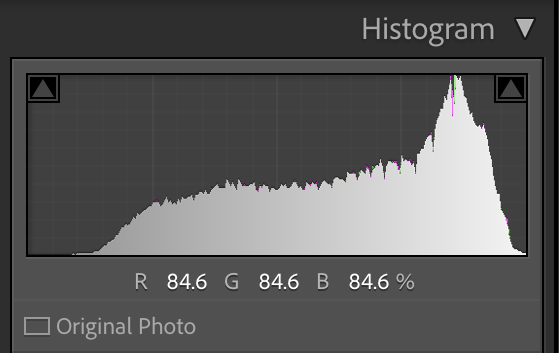
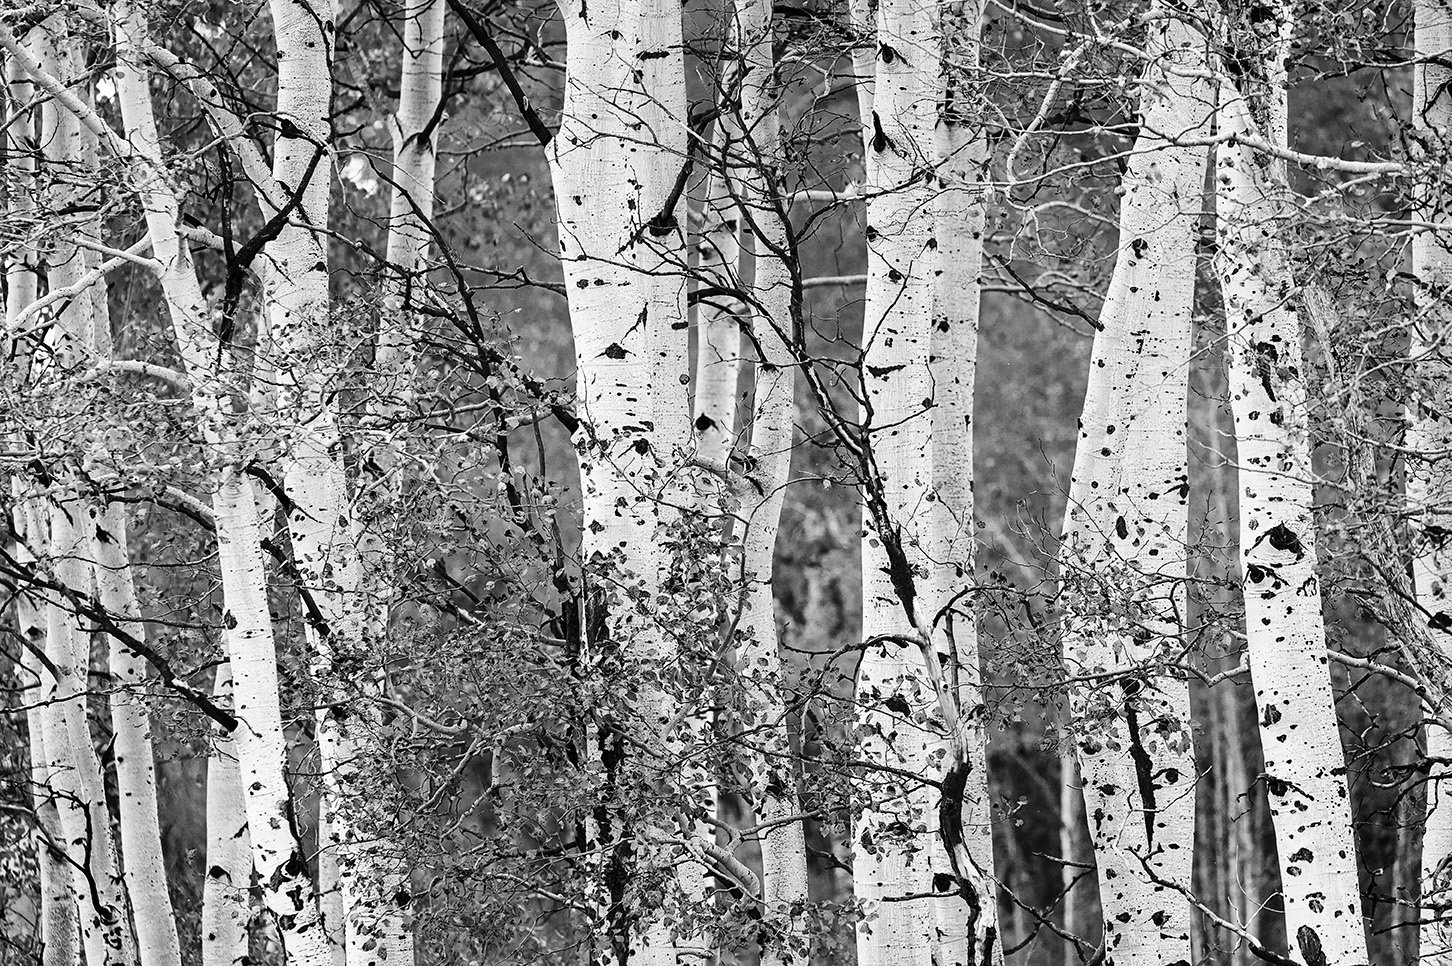
Keep in mind that strong black and white images don’t have histograms that all look the same. In some cases, tones are spread pretty evenly across the histogram like in the below image.

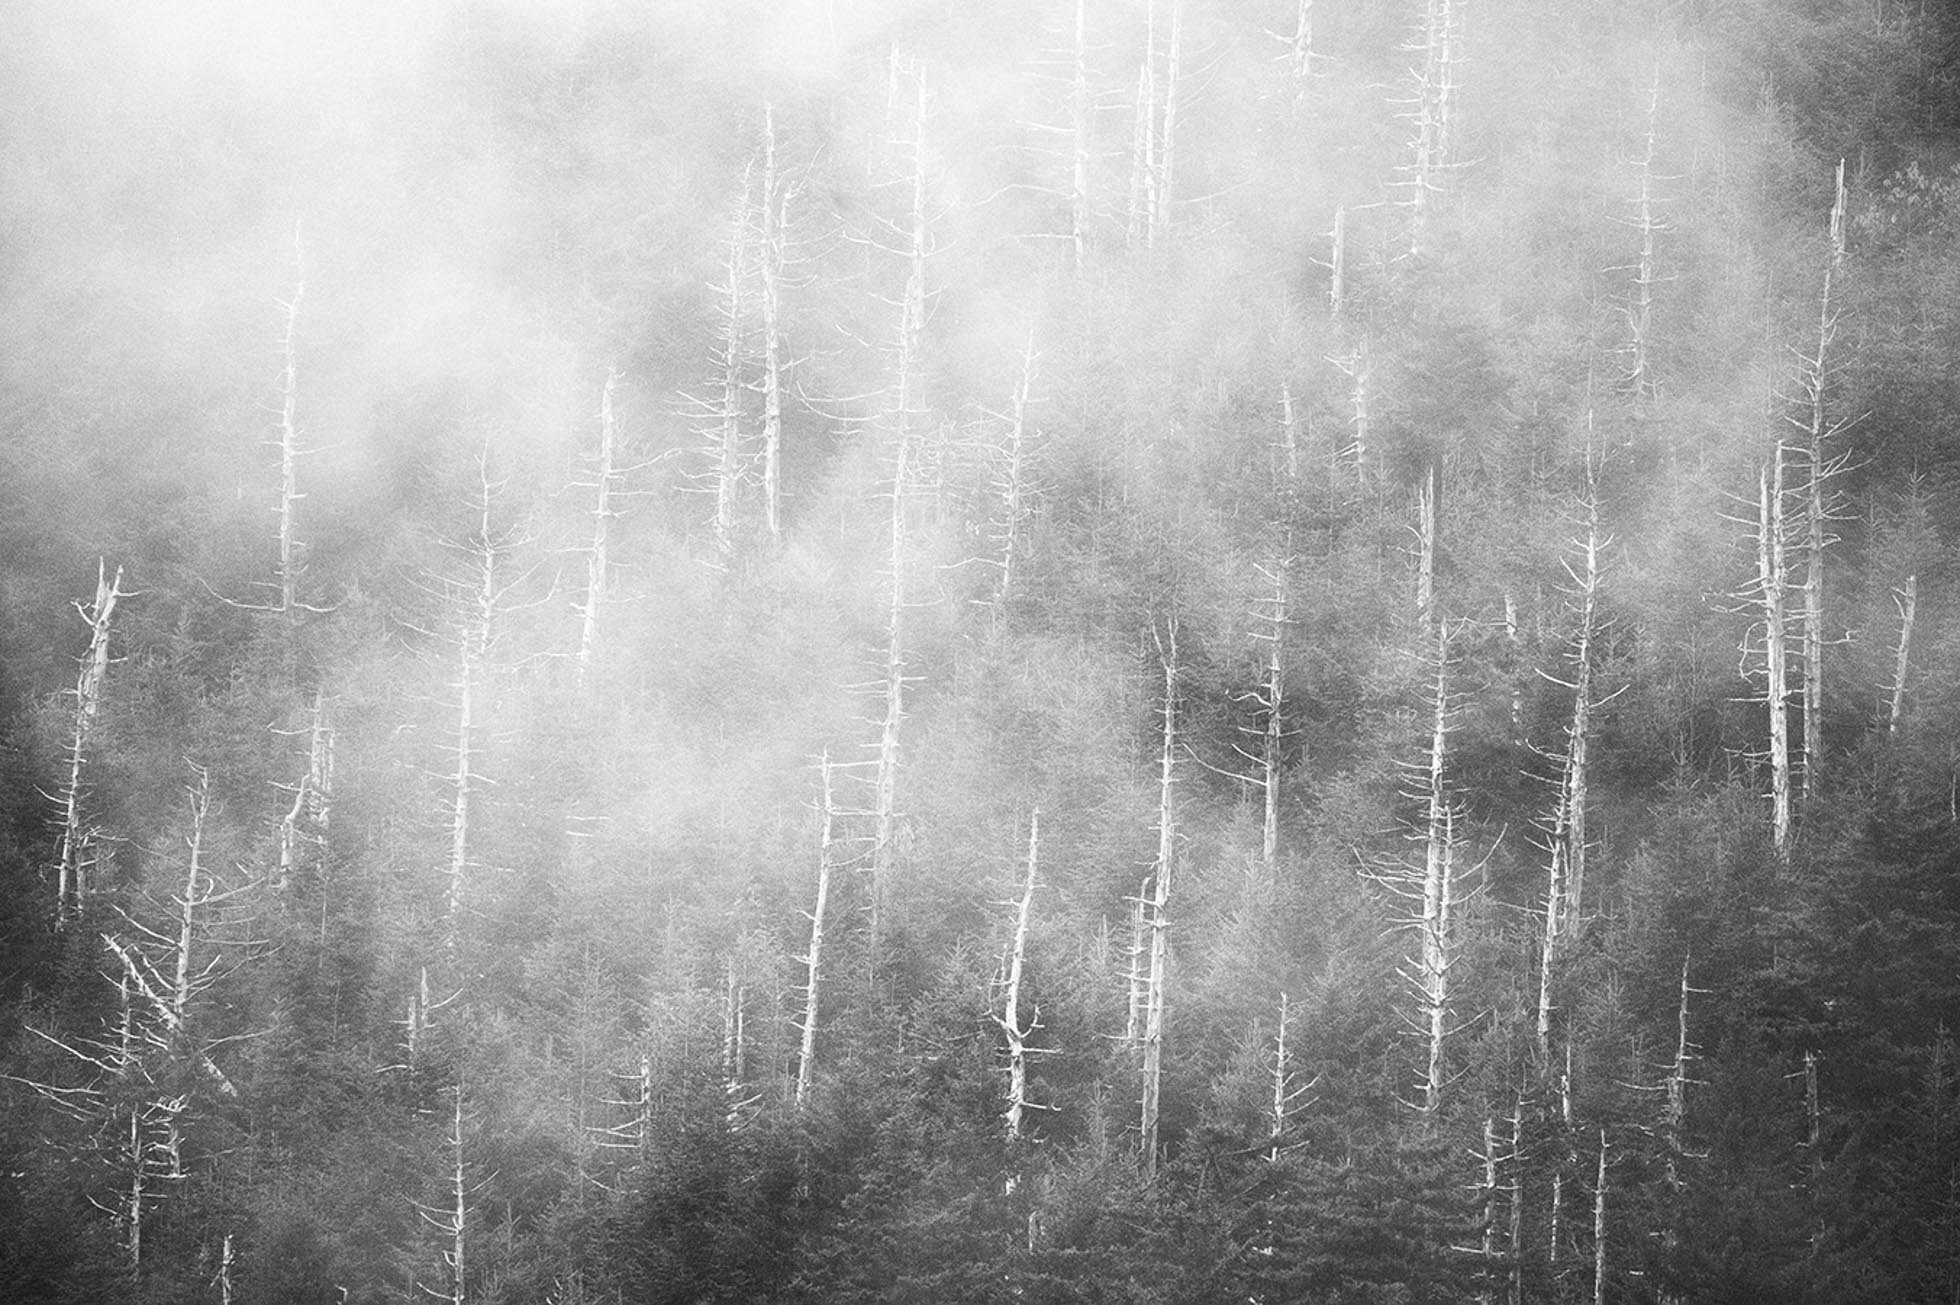
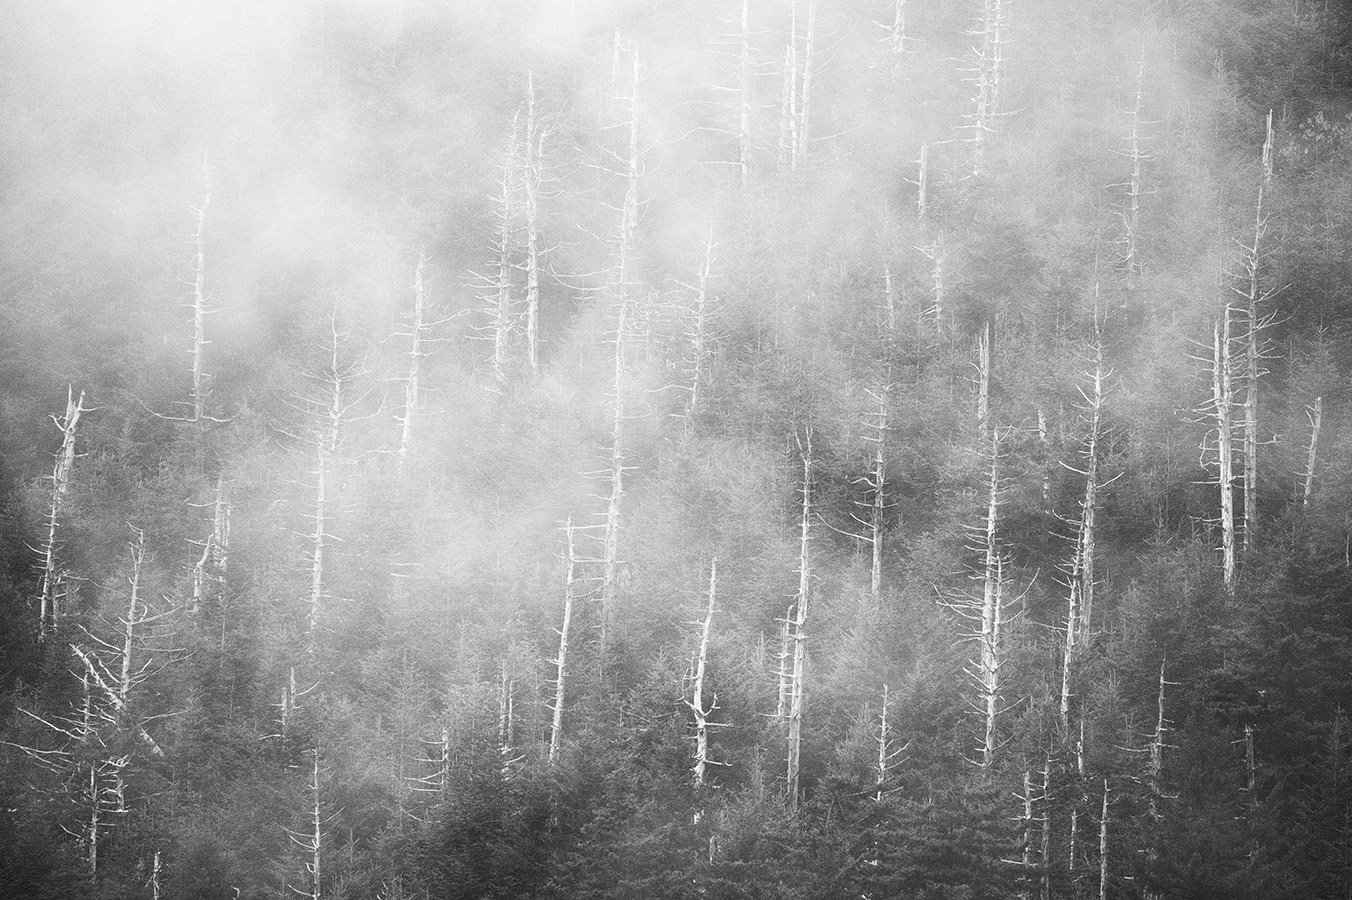
In some black and whites, there are more light tones where the histogram will lean towards the right like in this image with lots of fog amongst the trees.

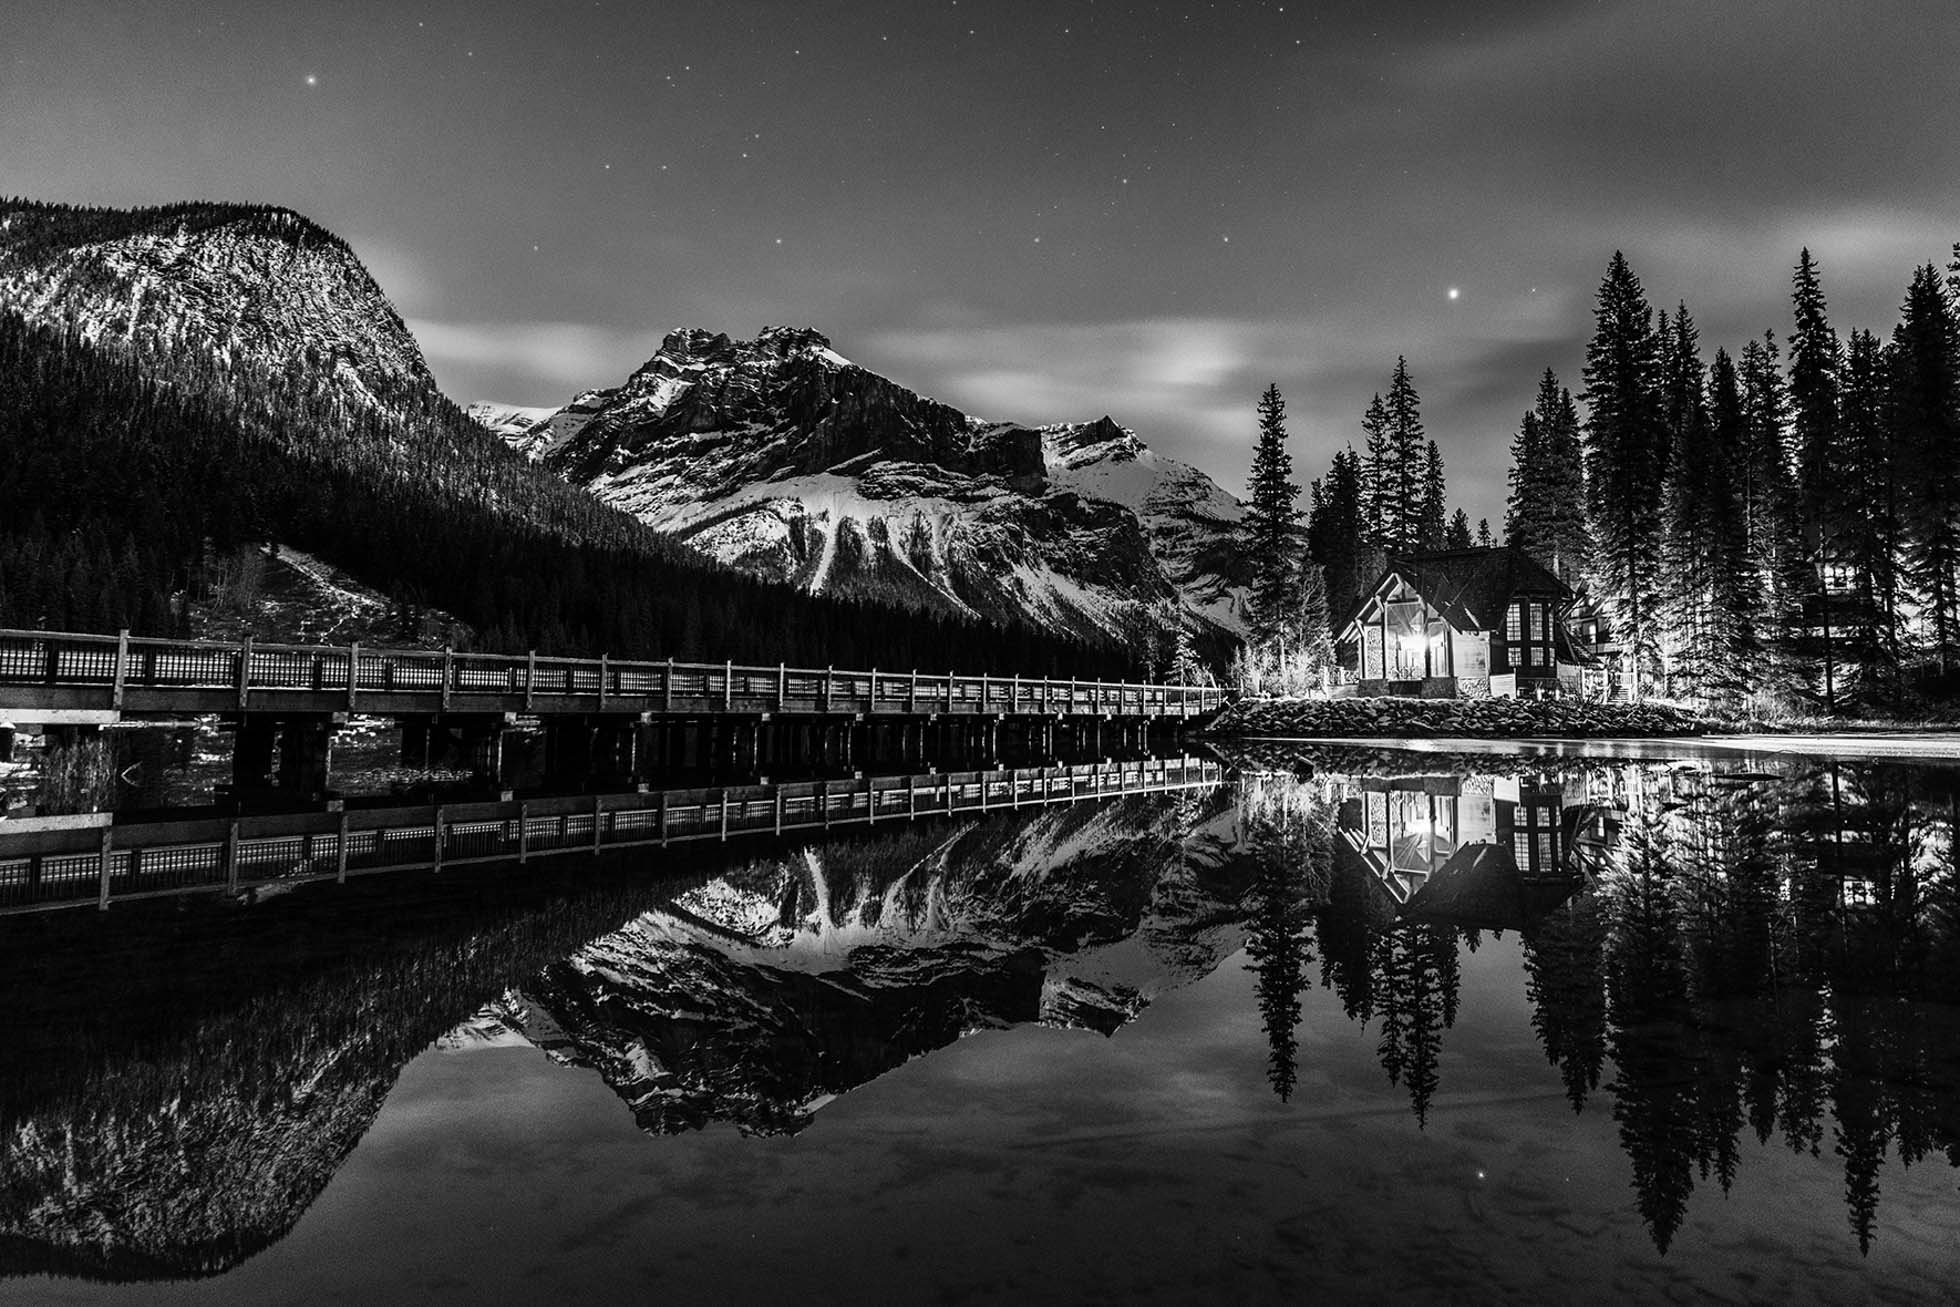
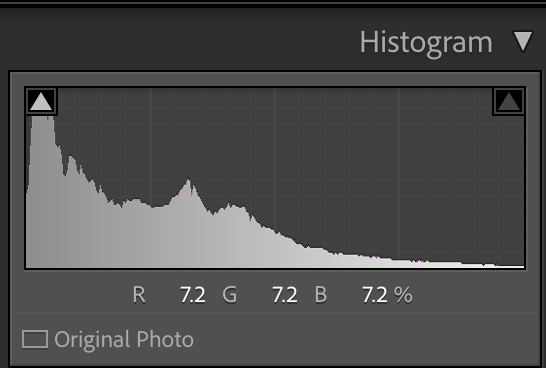
And in others, the tones will be heavy toward the left side of the histogram with lots of dark tones such as in this night time image of Emerald Lake. The histogram has a full range of tones from left to right, with the lights being the bright white tones, but the predominantly dark scene is represented by the histogram showing heavily on the left.

4) My last and most important tip is to EXPERIMENT! Practice with lots of images and try various techniques. Try different things with the same image. Ask for feedback from friends you trust. And don’t be afraid to push your adjustments a little further in black and white than color and get creative!

Post processing is a personal and subjective process. There are many tools in the various software programs. The techniques I share are ones that work for me, but you may have others that work best for you. That said, I always like to try new things and learn from others, so perhaps my steps will add something new to your workflow!


Kristen Ryan is an award winning and published landscape photographer and educator residing in the Midwest suburbs of Chicago. All images are available for purchase in the Fine Art Store or by request. Kristen leads ladies landscape photography retreats in the Tetons, Glacier NP, Hilton Head,  Chicago, and the Canadian Rockies, offers private mentoring . New online educational materials are coming soon!

4 Tips for Creating Compelling Black and White Landscape Imagery

Color is everywhere around us! Nature’s color  wows us with its vivid sunrises and sunsets, deep blue skies, forests of green, and rainbows of flowers. Landscape photographers seek golden hour light and the vibrant burn of the red setting sun for good reason. Our eyes are drawn to intense and contrasting colors. It can be hard to understand why one would want to strip that color out of a landscape photograph. 

While color is a compelling element in many images, color can also draw the eye so strongly that other aspects of a photo are minimized or even lost to a viewer. Elements such as light, texture, pattern and shape take center stage when color no longer competes for attention. A black and white landscape will tell a different story than the very same image in color.  There is a classic and timeless quality to black and white images as they draw focus to the mix of light and shadow, contrast and texture in a scene.

1) Learning to see in Black & White To create compelling black and white landscape images, we must find scenes with compositional elements and light that tell a strong story without the use of color. When color is no longer a focal point or supporting element, we are forced to find the other components of a scene that make it interesting.

When we previsualize in black and white we have to learn to see tonality in terms of shades of gray. Black and white is not only black and white but all the values of gray between true black and true white.  A wide range of tones throughout the histogram will create the strongest images. This means having tones that are bright white, various shades of gray, and black. When an image has too many of the same tones, the image will lack depth and distinction because everything blends together.

Learning to understand and see how the colors and areas of a landscape will translate into shades of gray comes from practice and experience. For example, deep blues and forest green colors will translate to darker gray or near black while yellow and light greens will be lighter shades of gray. These tonalities will also be influenced by the exposure you choose at capture and how you adjust them in post processing.

2 ) LOOK FOR THE LIGHT: 

Compelling black and white landscape imagery can be created in varying lighting situations. Dramatic light and scenes with a high dynamic range including bright highlights and dark shadows will naturally introduce strong contrast. I love to look for scenes where there are pockets of light across the landscape. Choosing black and white in a scene like this creates a story all about the dance of light and shadow.  

Harsh daytime light is often considered unfavorable for color landscape photography but this kind of light can work well in black and white imagery. Bright sunlight is extremely effective in bringing out the detail of various textures by emphasizing the various tones across a surface.  Deep blue skies turn dark in a black and white conversion and highlight lighter toned subjects. Stormy skies are a great opportunity for grand black and white landscapes as they create a dramatic and foreboding mood.

3) Find the Contrast: 

Contrast is important in black and white landscapes both for tonal range and visual balance. The main subject must stand out amongst its surroundings. A dark subject needs to be set against a lighter background or a light subject against a darker background to be successful. For example, a bright waterfall flowing over dark rocks, or dark trees amidst light misty clouds. Through the frame, also look for areas of micro-contrast where light and dark tones contrast to highlight textures and patterns, such as in layers of rocks or in the movement of waves. The mix of tonality works to bring attention to these textures and shapes and creates depth. 

With the way that black and white imagery emphasizes texture and form so beautifully, one way to elevate and balance the visual interest in an image is to use the contrast between various textures of the landscape. Using post processing tools to enhance these contrasting details will elevate an image from average to outstanding. 

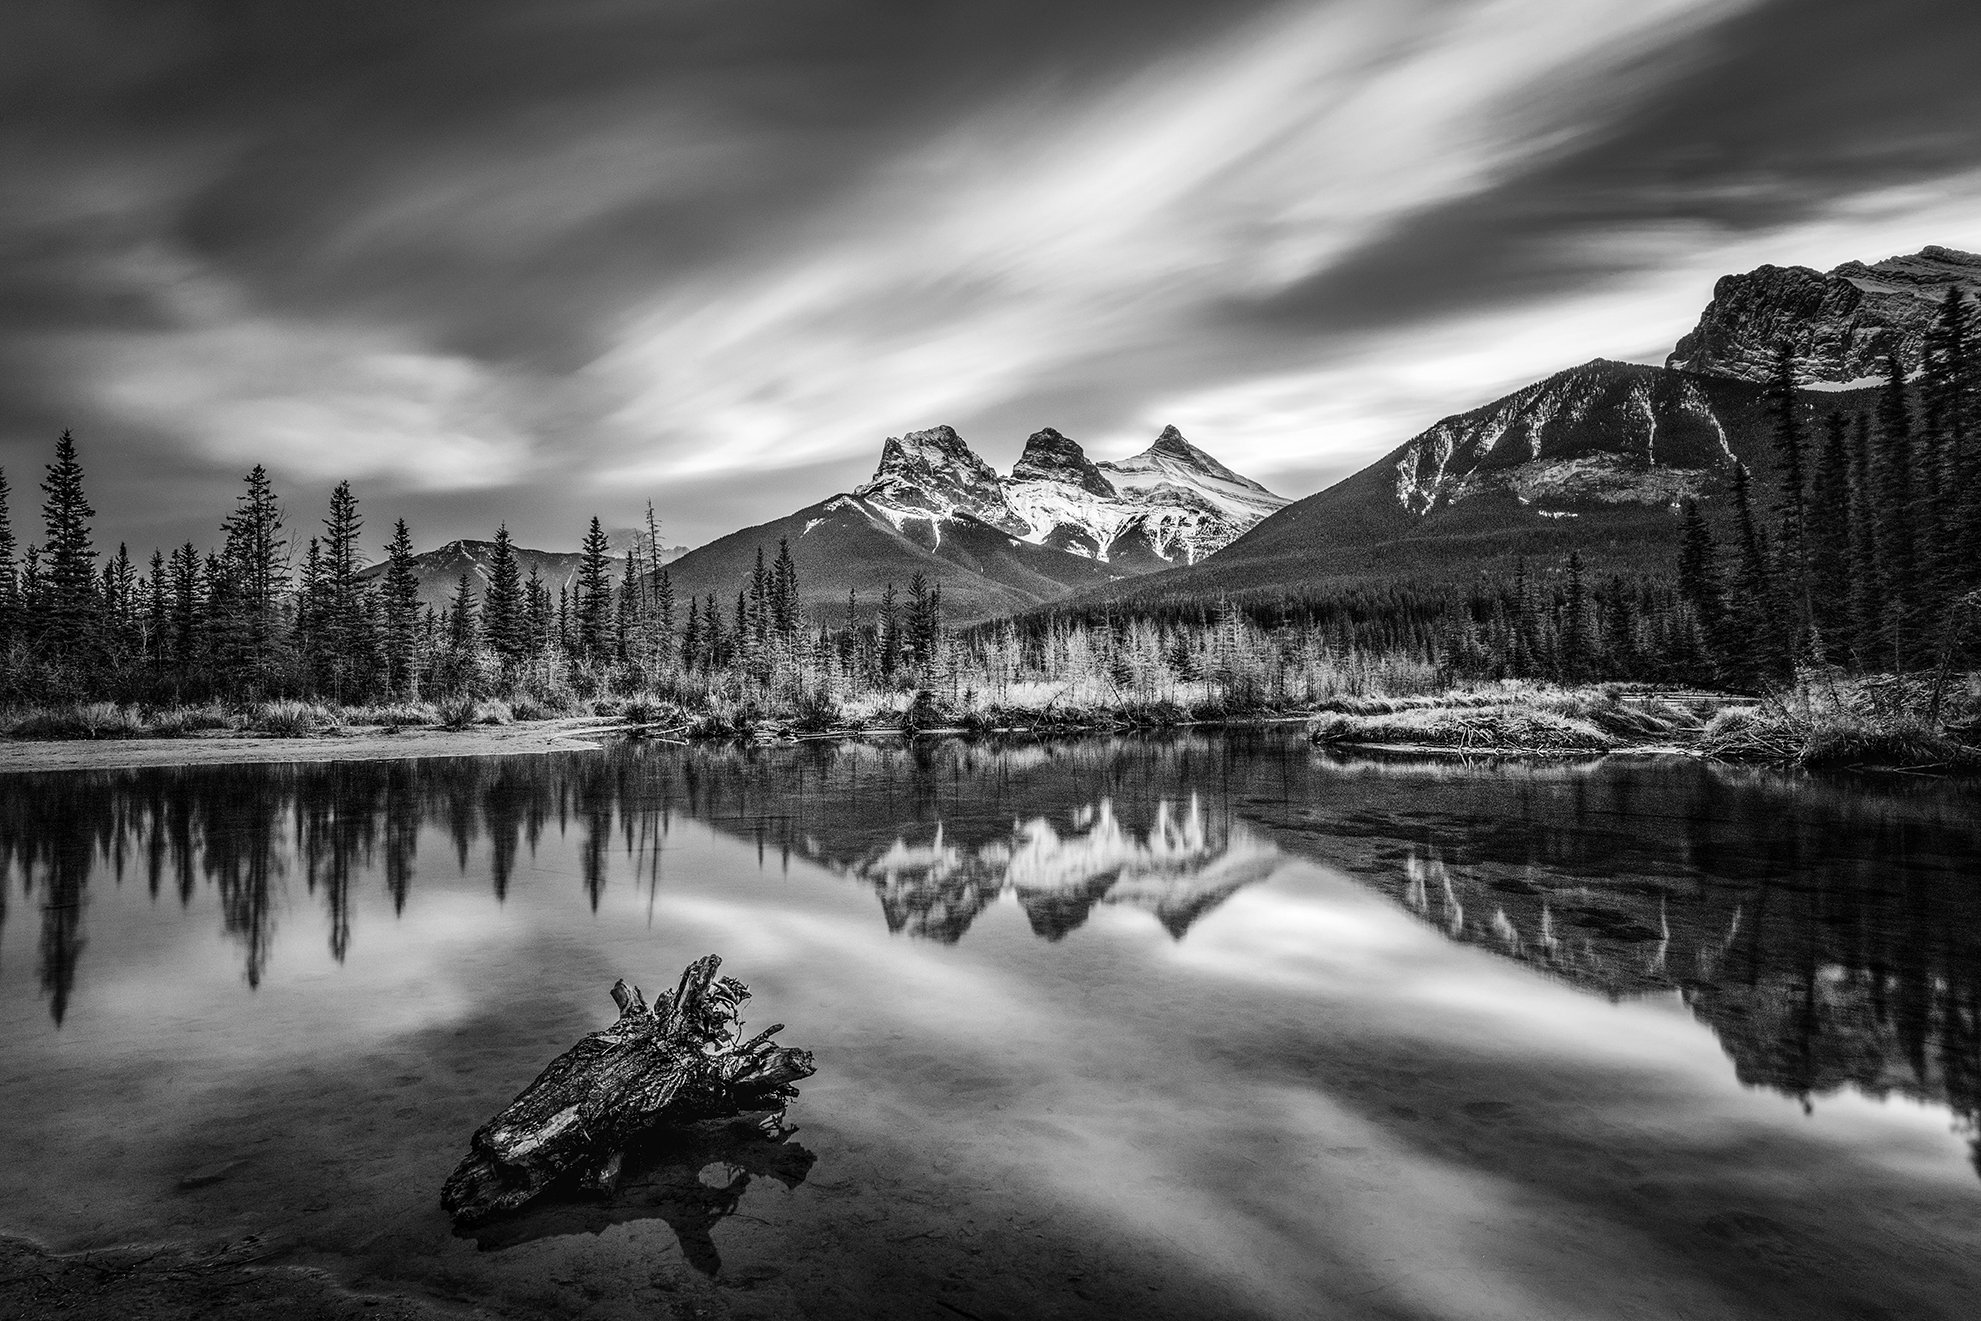
Contrast areas of detailed and rough textures with soft and smooth creates layers and depth. For example, consider an image with several layers including rocks in the foreground of smooth water, jagged mountains, and then soft wispy clouds in the sky. Using neutral density filters and slow shutter speeds is a great technique to use for creating the softness in the water or sky. 

4) Emphasize Lines, Texture, and Patterns

Black and white landscape and nature photographs are a great way to emphasize lines, textures and patterns in a scene. The stripping of light brings out the beauty of these elements. Look for repetitive lines or shapes naturally occurring in the landscape. Notice how the light can bring out micro contrast in textures such as rock, sand and trees.  And as mentioned above, look for those texture contrasts between smooth and rough as this creates visual interest and depth. 

Next time you’re out photographing, give a little thought to black and white! I hope these tips help you out!


Kristen Ryan is an award winning and published landscape photographer and educator residing in the Midwest suburbs of Chicago. All images are available for purchase in the Fine Art Store or by request. Kristen leads ladies landscape photography retreats in the Tetons, Glacier NP, Hilton Head,  Chicago, and the Canadian Rockies, offers private mentoring . New online educational materials are coming soon!