4 Tips for Creating Compelling Black and White Landscape Imagery

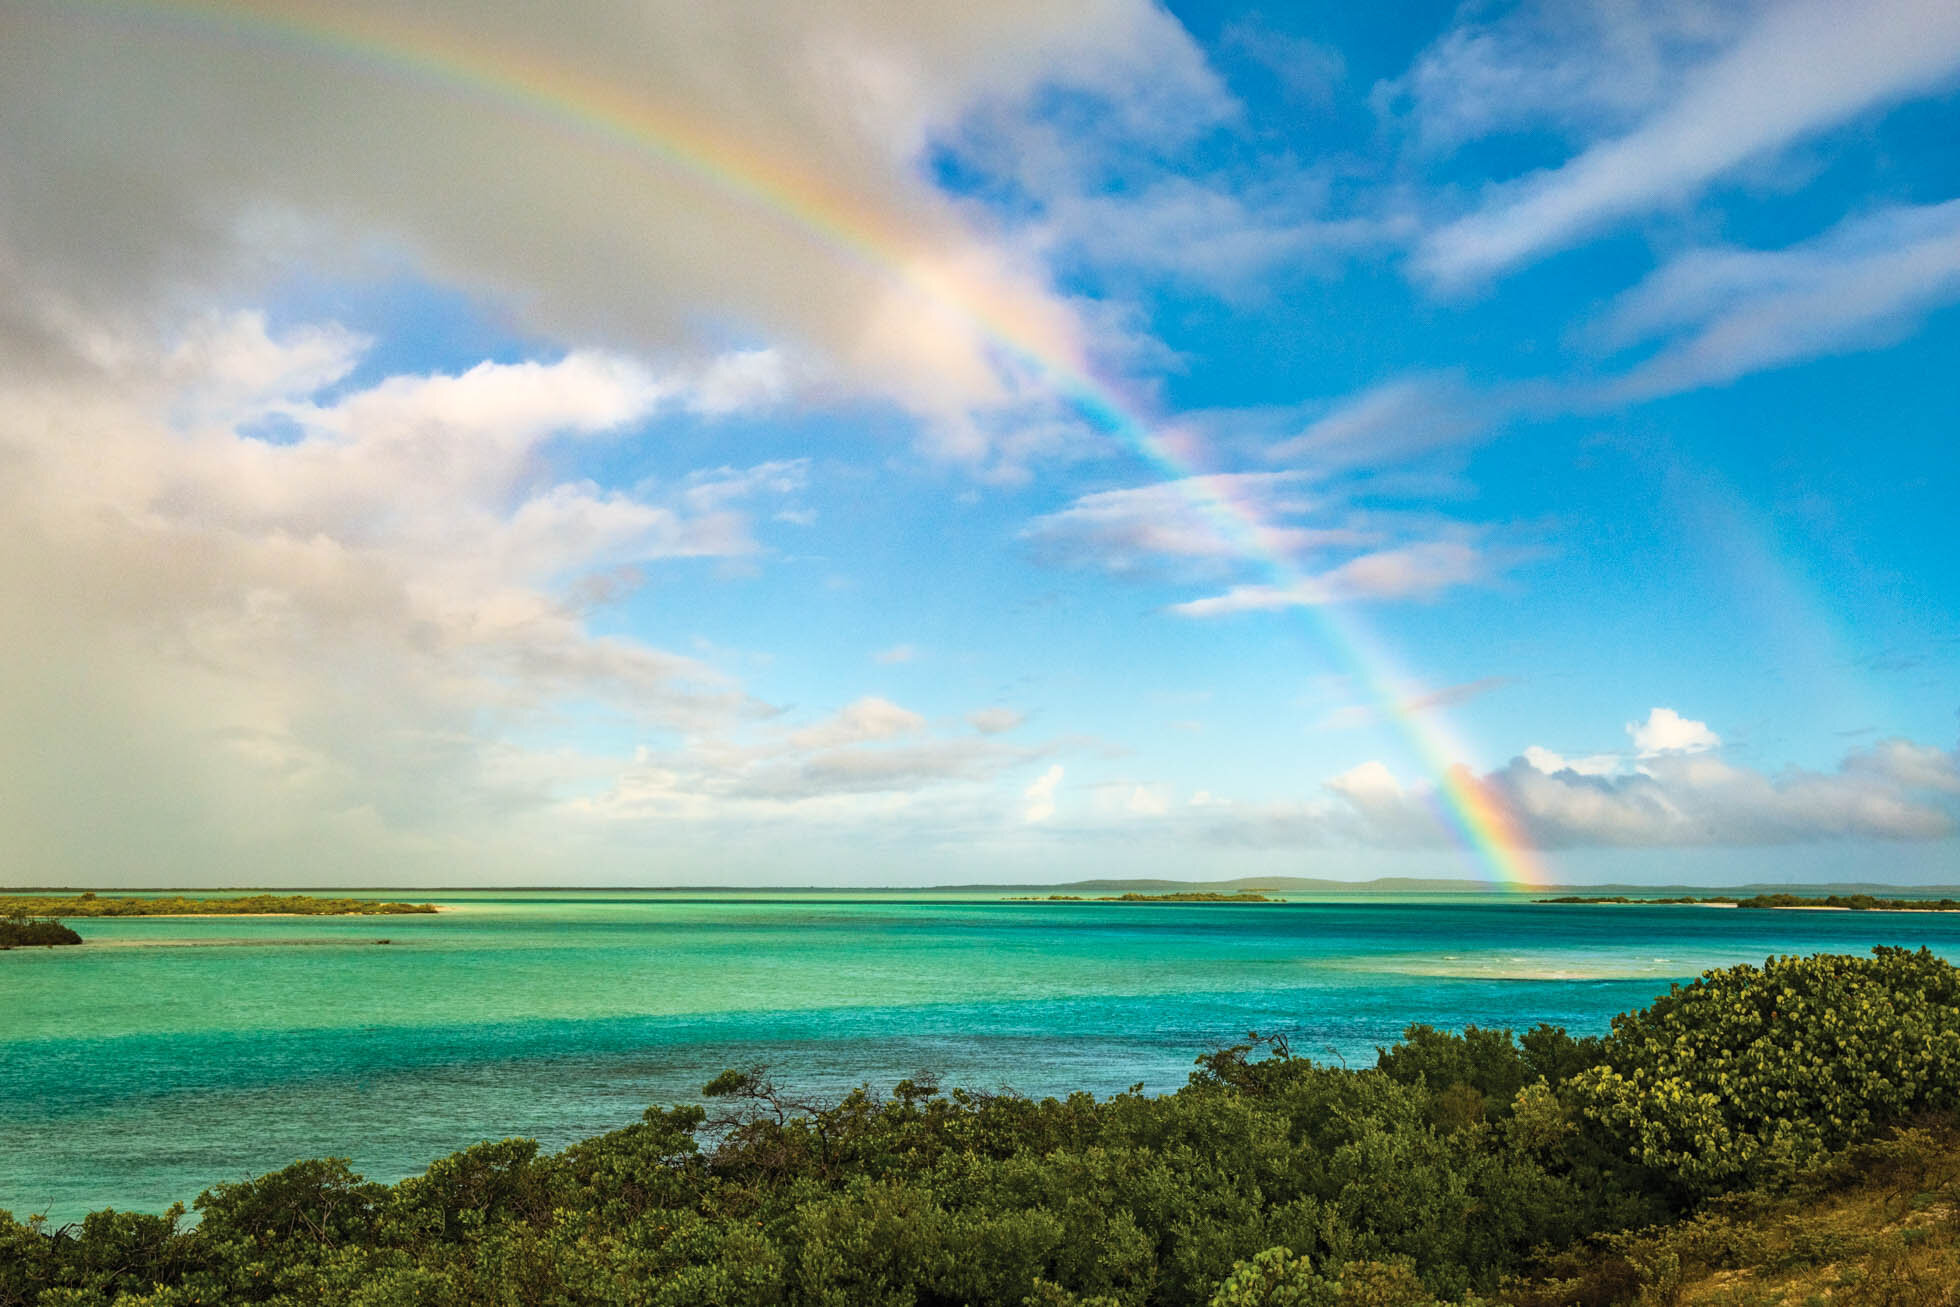
Color is everywhere around us! Nature’s color  wows us with its vivid sunrises and sunsets, deep blue skies, forests of green, and rainbows of flowers. Landscape photographers seek golden hour light and the vibrant burn of the red setting sun for good reason. Our eyes are drawn to intense and contrasting colors. It can be hard to understand why one would want to strip that color out of a landscape photograph. 

While color is a compelling element in many images, color can also draw the eye so strongly that other aspects of a photo are minimized or even lost to a viewer. Elements such as light, texture, pattern and shape take center stage when color no longer competes for attention. A black and white landscape will tell a different story than the very same image in color.  There is a classic and timeless quality to black and white images as they draw focus to the mix of light and shadow, contrast and texture in a scene.

1) Learning to see in Black & White To create compelling black and white landscape images, we must find scenes with compositional elements and light that tell a strong story without the use of color. When color is no longer a focal point or supporting element, we are forced to find the other components of a scene that make it interesting.

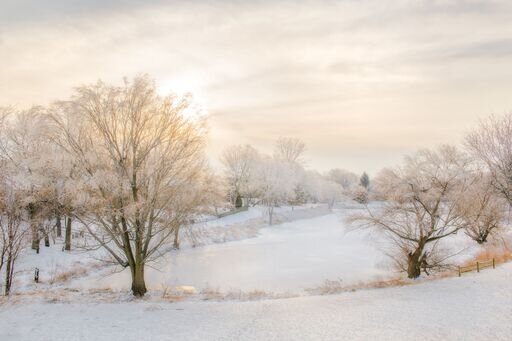
When we previsualize in black and white we have to learn to see tonality in terms of shades of gray. Black and white is not only black and white but all the values of gray between true black and true white.  A wide range of tones throughout the histogram will create the strongest images. This means having tones that are bright white, various shades of gray, and black. When an image has too many of the same tones, the image will lack depth and distinction because everything blends together.

Learning to understand and see how the colors and areas of a landscape will translate into shades of gray comes from practice and experience. For example, deep blues and forest green colors will translate to darker gray or near black while yellow and light greens will be lighter shades of gray. These tonalities will also be influenced by the exposure you choose at capture and how you adjust them in post processing.

2 ) LOOK FOR THE LIGHT: 

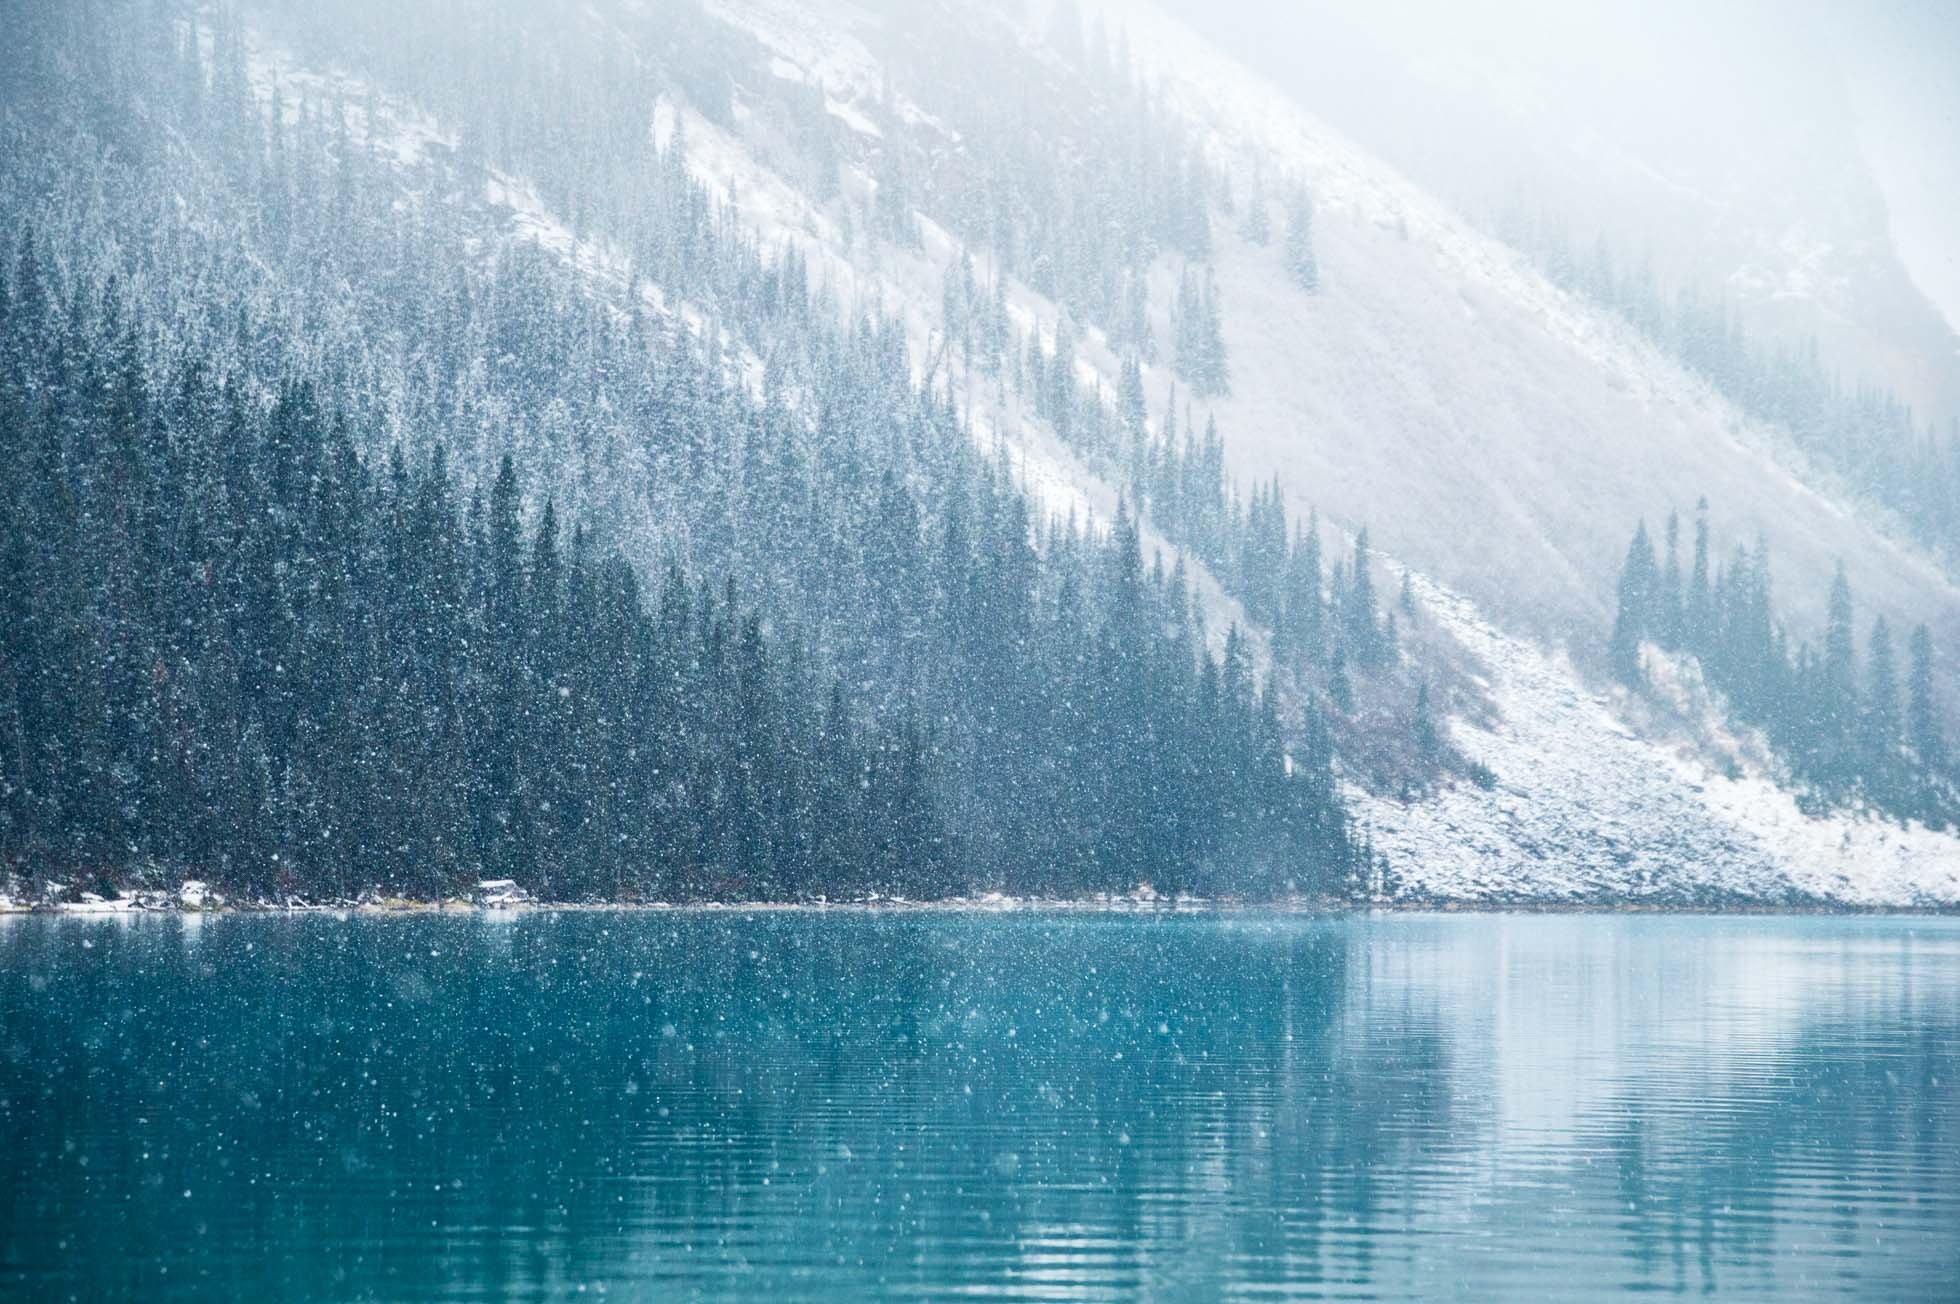
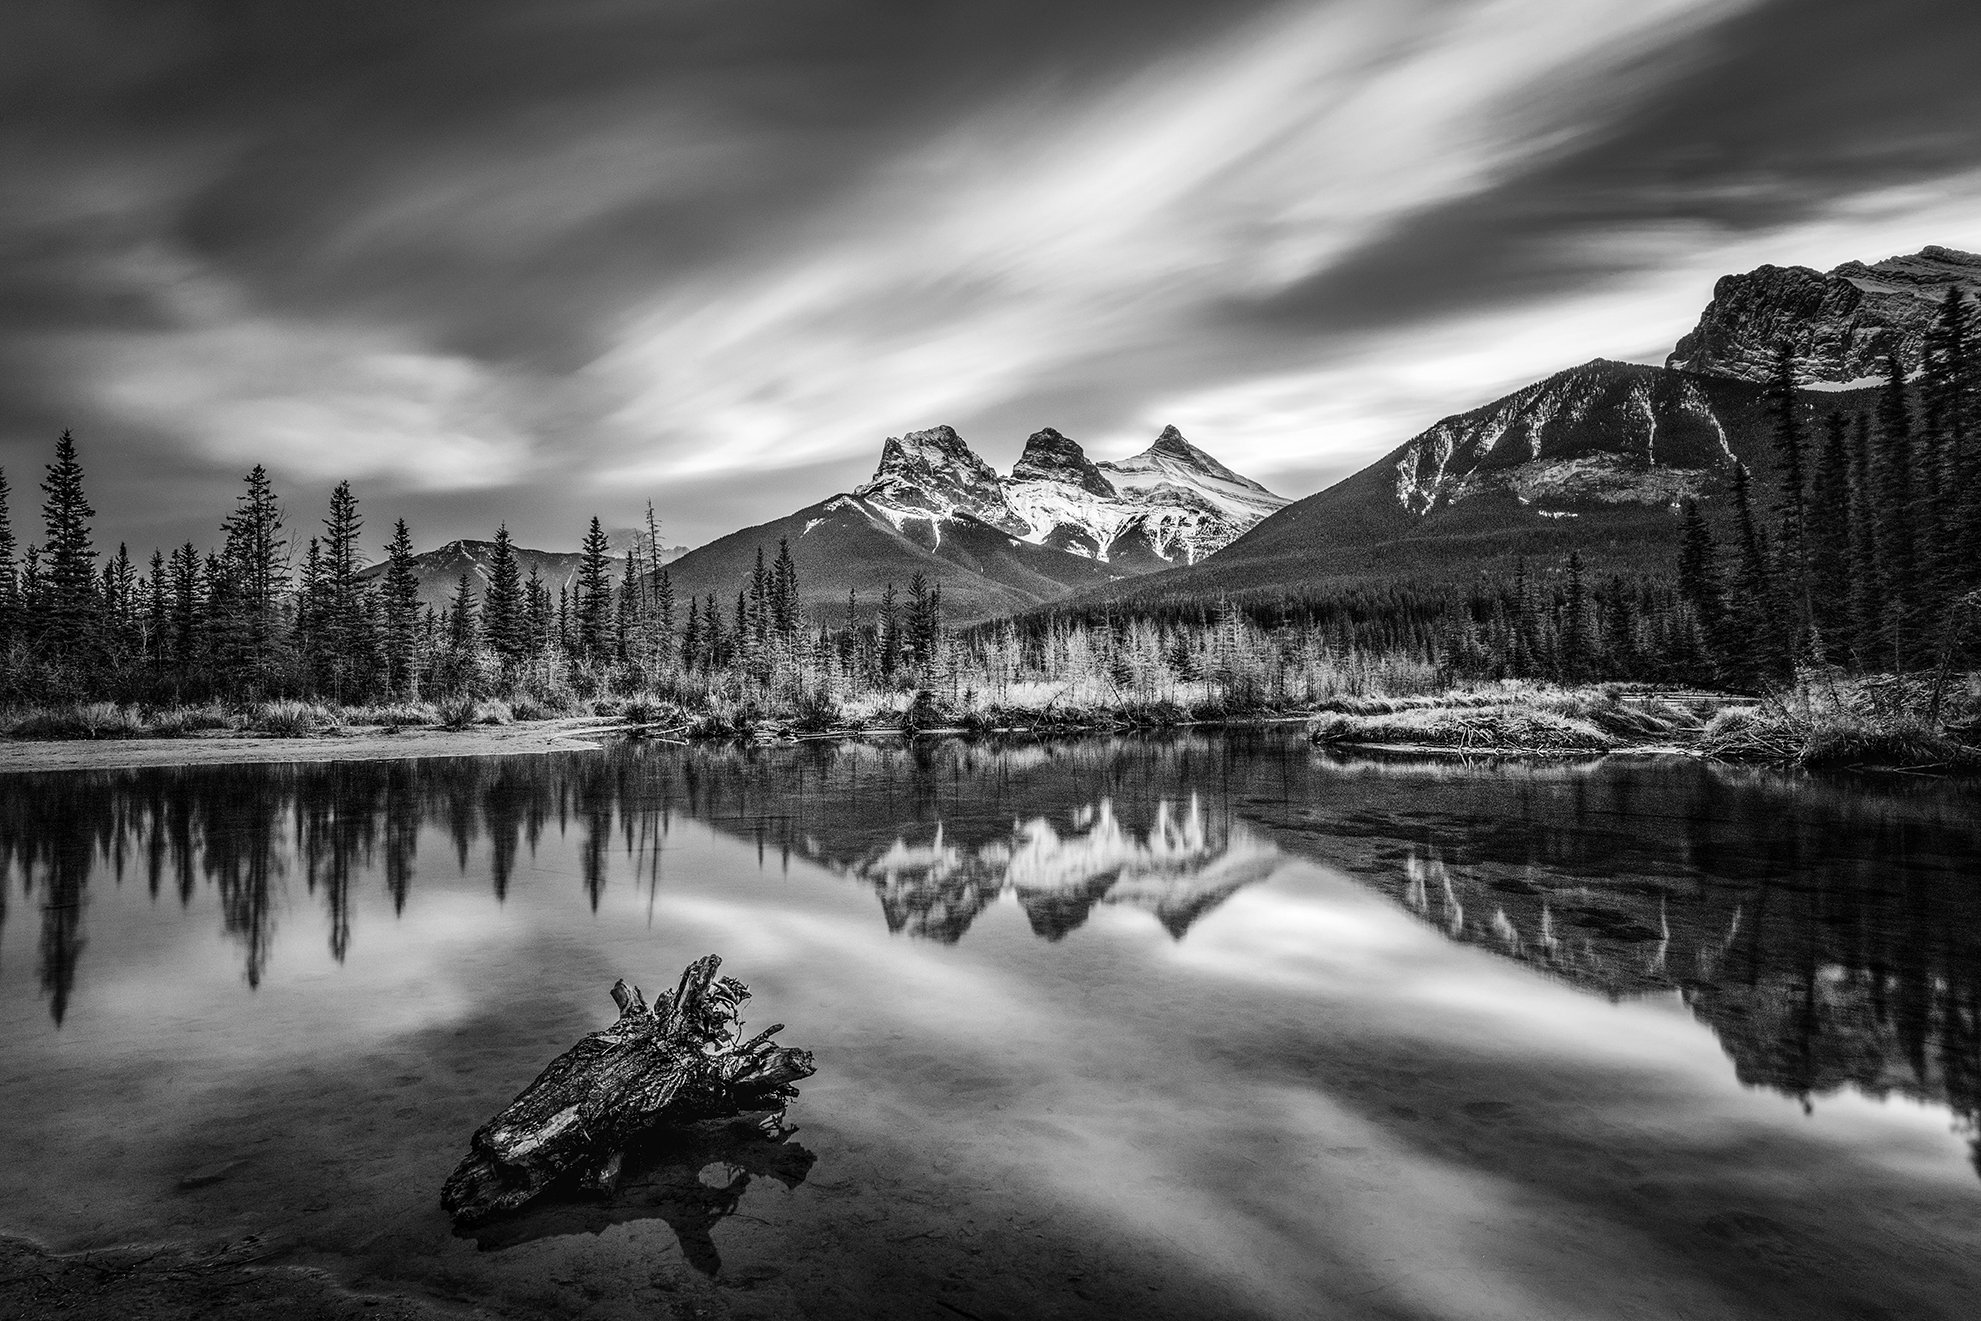
Compelling black and white landscape imagery can be created in varying lighting situations. Dramatic light and scenes with a high dynamic range including bright highlights and dark shadows will naturally introduce strong contrast. I love to look for scenes where there are pockets of light across the landscape. Choosing black and white in a scene like this creates a story all about the dance of light and shadow.  

Harsh daytime light is often considered unfavorable for color landscape photography but this kind of light can work well in black and white imagery. Bright sunlight is extremely effective in bringing out the detail of various textures by emphasizing the various tones across a surface.  Deep blue skies turn dark in a black and white conversion and highlight lighter toned subjects. Stormy skies are a great opportunity for grand black and white landscapes as they create a dramatic and foreboding mood.

3) Find the Contrast: 

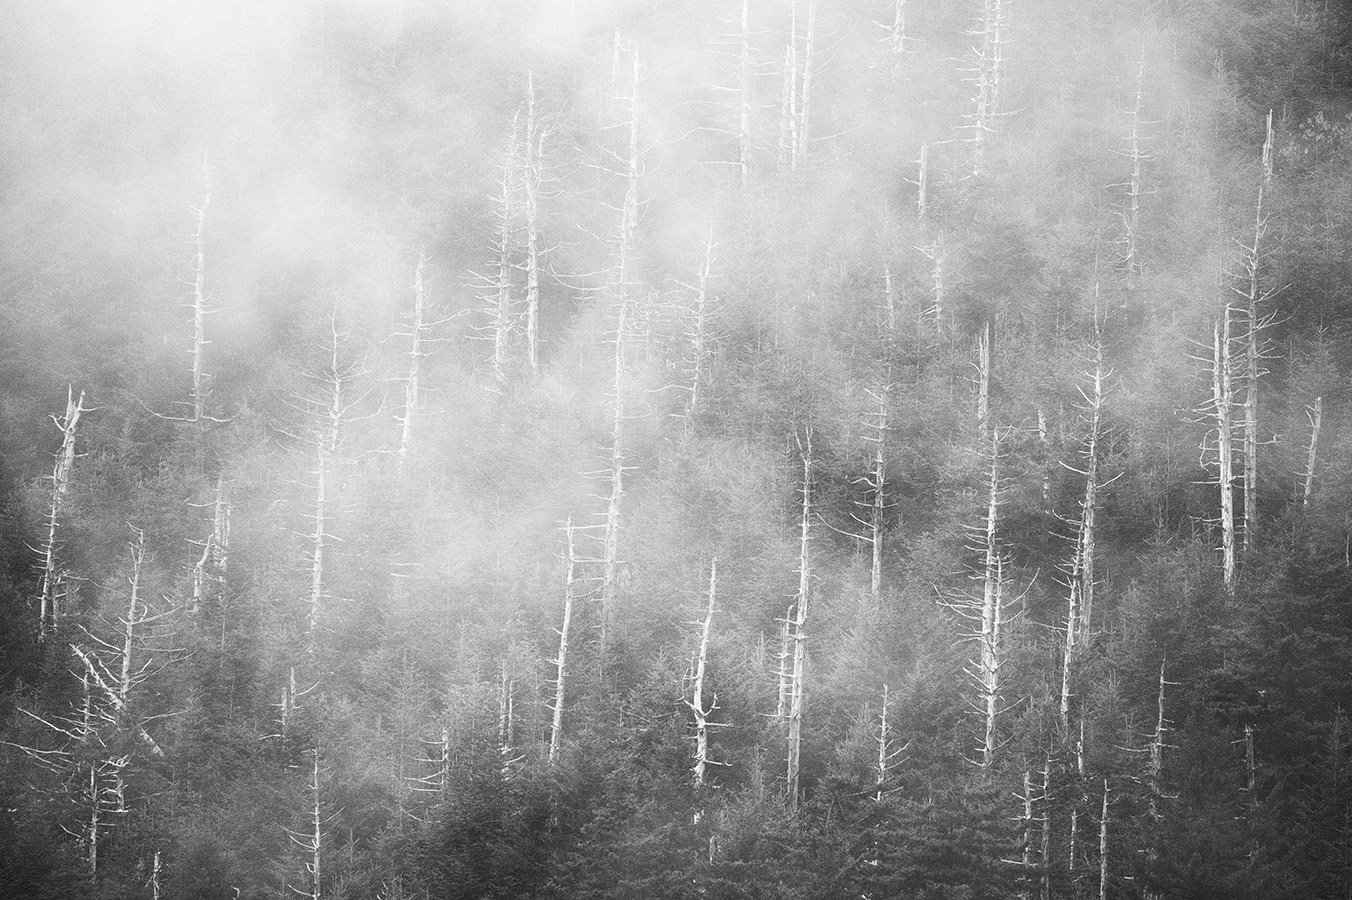
Contrast is important in black and white landscapes both for tonal range and visual balance. The main subject must stand out amongst its surroundings. A dark subject needs to be set against a lighter background or a light subject against a darker background to be successful. For example, a bright waterfall flowing over dark rocks, or dark trees amidst light misty clouds. Through the frame, also look for areas of micro-contrast where light and dark tones contrast to highlight textures and patterns, such as in layers of rocks or in the movement of waves. The mix of tonality works to bring attention to these textures and shapes and creates depth. 

With the way that black and white imagery emphasizes texture and form so beautifully, one way to elevate and balance the visual interest in an image is to use the contrast between various textures of the landscape. Using post processing tools to enhance these contrasting details will elevate an image from average to outstanding. 

Contrast areas of detailed and rough textures with soft and smooth creates layers and depth. For example, consider an image with several layers including rocks in the foreground of smooth water, jagged mountains, and then soft wispy clouds in the sky. Using neutral density filters and slow shutter speeds is a great technique to use for creating the softness in the water or sky. 

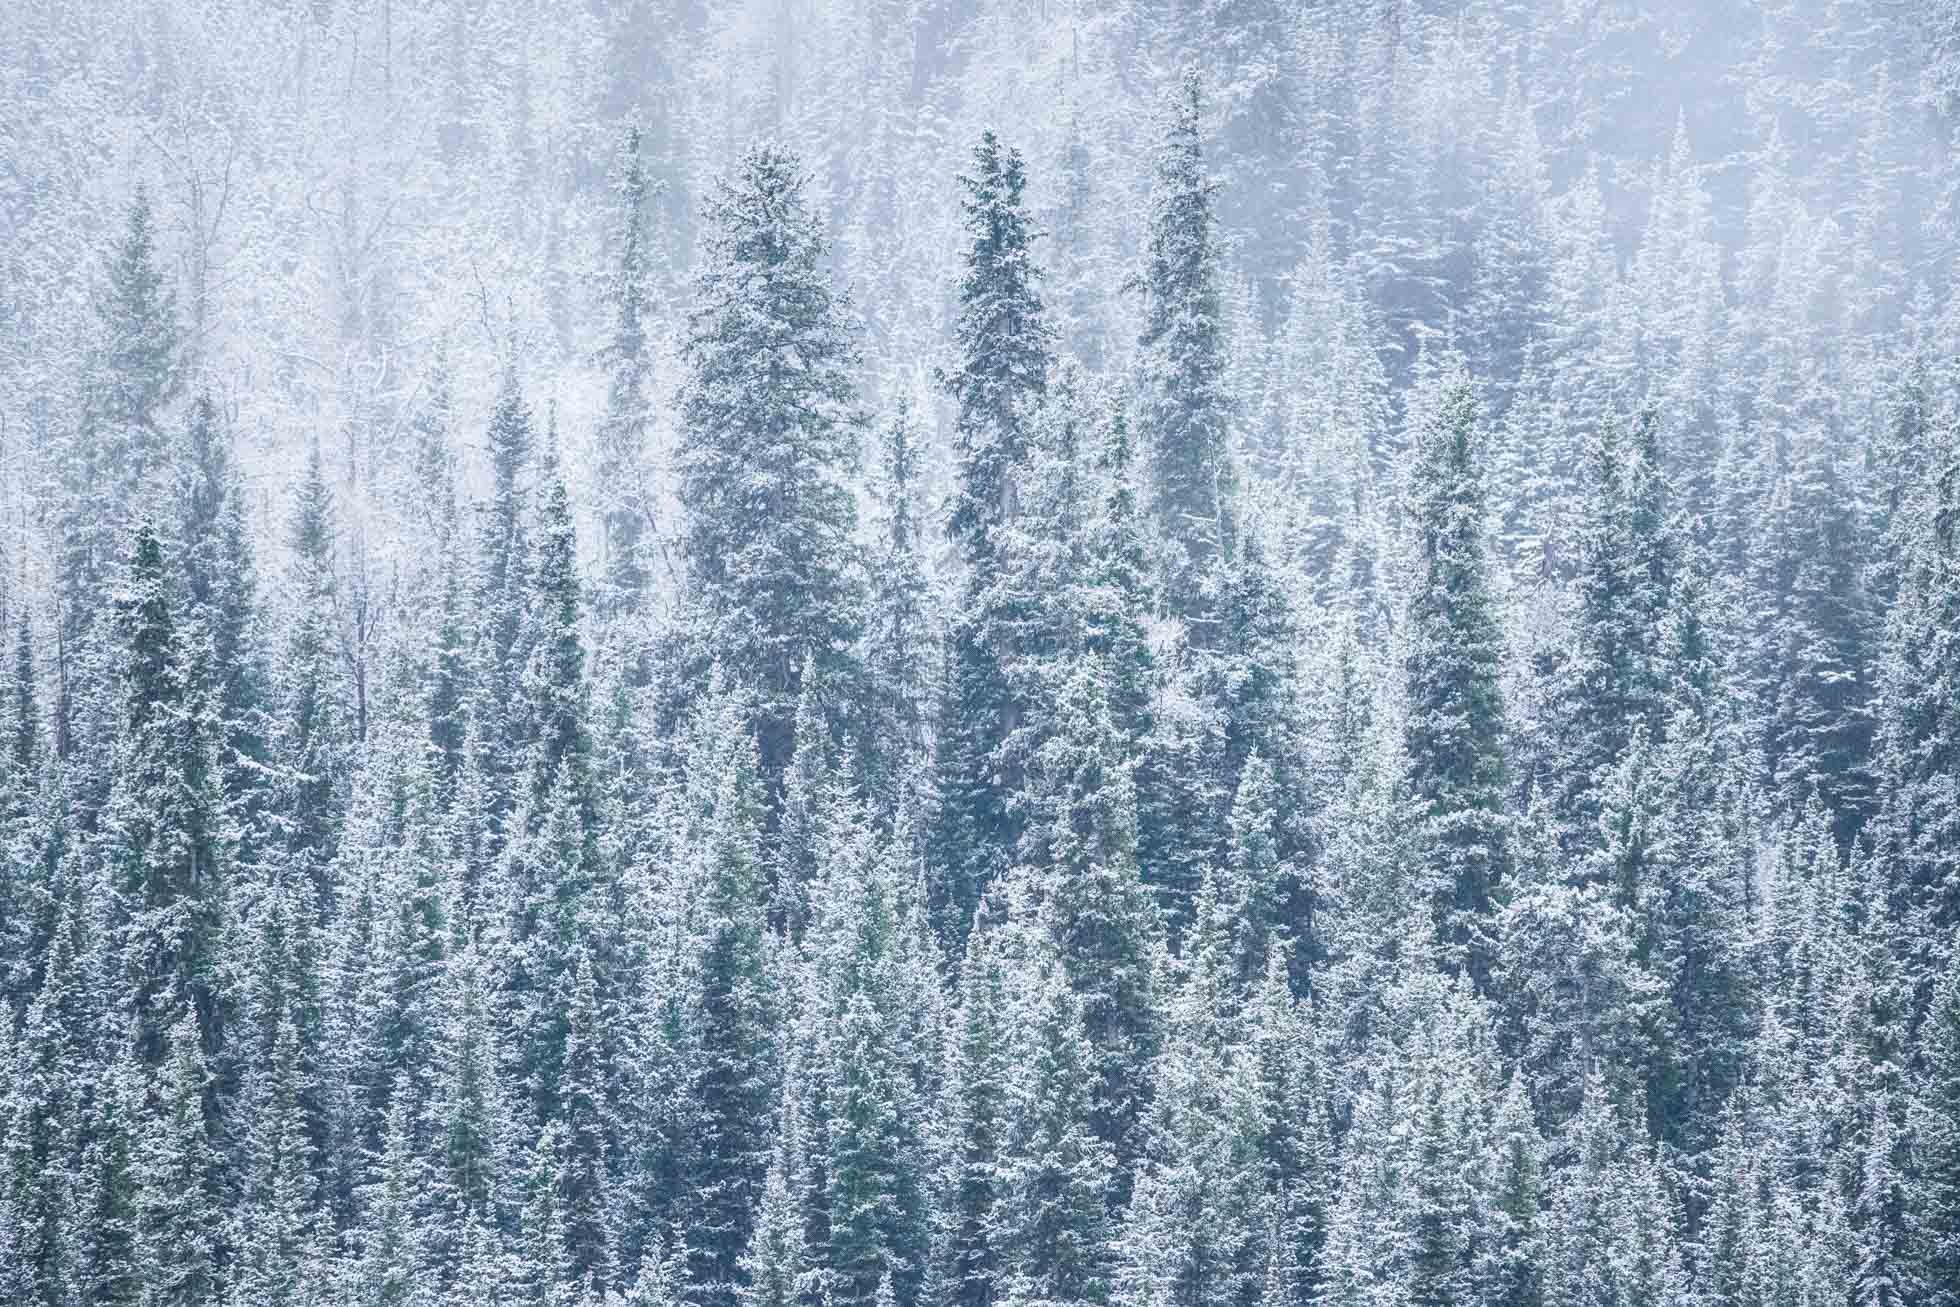
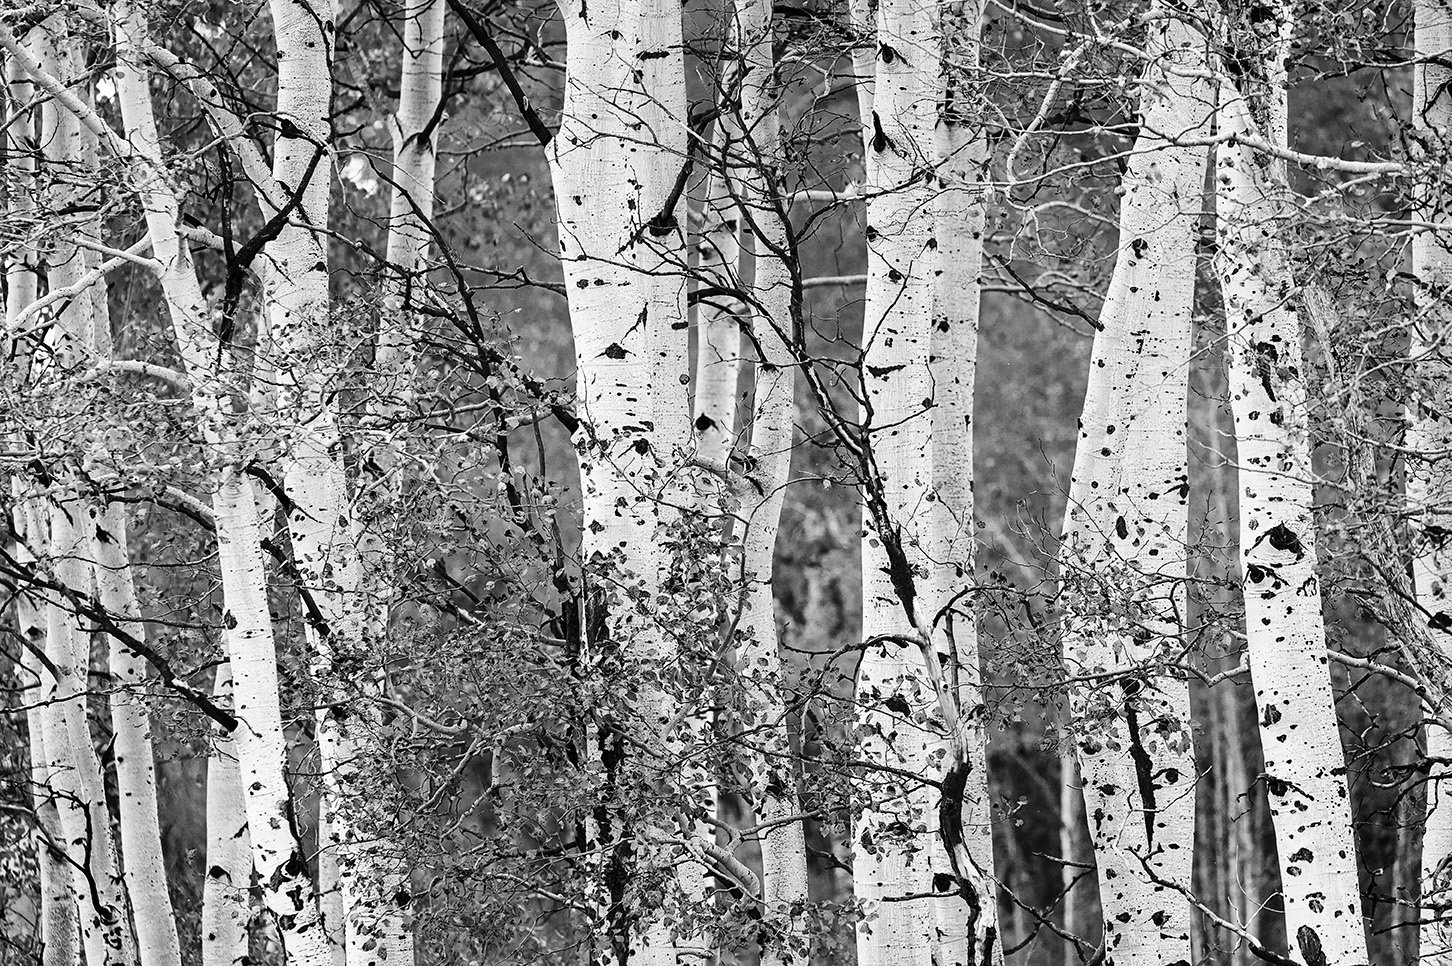
4) Emphasize Lines, Texture, and Patterns

Black and white landscape and nature photographs are a great way to emphasize lines, textures and patterns in a scene. The stripping of light brings out the beauty of these elements. Look for repetitive lines or shapes naturally occurring in the landscape. Notice how the light can bring out micro contrast in textures such as rock, sand and trees.  And as mentioned above, look for those texture contrasts between smooth and rough as this creates visual interest and depth. 

Next time you’re out photographing, give a little thought to black and white! I hope these tips help you out!


Kristen Ryan is an award winning and published landscape photographer and educator residing in the Midwest suburbs of Chicago. All images are available for purchase in the Fine Art Store or by request. Kristen leads ladies landscape photography retreats in the Tetons, Glacier NP, Hilton Head,  Chicago, and the Canadian Rockies, offers private mentoring . New online educational materials are coming soon!

6 Quick Tips for Photographing in the Falling Snow

Have you had your first snowfall yet this year? It seems the snowy weather is late for most areas this year. It is unseasonably warm here in Chicago right now, but after this warm snap, it looks like winter temps are on their way, and I can’t help wishing for snow and a white Christmas. There is something so magical about the first snowfall. 

While Chicago is still awaiting the snow, I was lucky enough to experience a beautiful snowfall at Lake Louise this past October. In fact, I chose that location for the group that morning specifically because there was a strong chance of snow and there are few things more magical than freshly falling snow in the mountains. 

Lake Louise captured with the Sigma 24-105mm at 105mm

Shutter speed 1/160 to capture the falling snowflakes

There are a few things to consider when photographing in falling snow, both technically and creatively, to come away with the magic of the snowfall! 

1) Use a lens hood to help keep your lens free of falling snowflakes! As the snowflakes fall, they can land on your lens and melt, creating droplets that show up as spots in your images. Obviously this is not ideal. A lens hood can help to protect the front of your lens as you photograph.

2) Keep a microfiber cloth handy to dry your lens of the snowflakes that make their way onto your lens. Even with a lenshood, sometimes the direction of the falling snow and wind can still cause some flakes to land on your lens. Be sure to check your lens between exposures and use the cloth to clear it free of moisture.

3) Use a rain/snow cover over your camera to protect it from the moisture!

4) Avoid changing lenses as the snow falls to keep moisture out of the inside of your camera. If you have more than one camera body, put a wider angle lens on one camera and a telephoto lens on the second.

Snow in the trees captured with the Sigma 150-600mm Contemporary lens with a shutter speed of 1/800

5) Consider your shutter speed. Use a fast shutter speed to freeze the falling snow if you want to emphasize the snowflakes. A slower shutter speed will show the movement of the flakes with streaks that look more like falling rain.

6) Look for dark backgrounds to emphasize the snowflakes. The white snow will blend into the sky or other light area of the scene. Backgrounds like deep green trees or blue waters will allow the white snowflakes to stand out!

Snow falling on Lake Louise captured with the Sigma 24-105mm at 82mm . I shifted my perspective to the water and trees so that the snowflakes would show up against the darker backgrounds.

Hope you get out there to photograph when the snow arrives!


Kristen Ryan is an award winning and published landscape photographer and educator residing in the Midwest suburbs of Chicago. All images are available for purchase in the Fine Art Store or by request. Kristen leads ladies landscape photography retreats in the Tetons, Glacier NP, Hilton Head,  Chicago, and the Canadian Rockies, offers private mentoring . New online educational materials are coming soon!

Night Photography Part 1: Preparation

Night photography is one of my very favorite genres to shoot whenever I get the chance. And when I say Night Photography, I mean both Astrophotography and general night photography, such as night cityscapes, light trails, and other night scenes. Today’s tips for preparation apply to all areas of night photography. If you are looking for Astrophotography tips in particular you can visit my past blog posts: 9 Tips for Astrophotography Part 1 and 9 More Tips for Astrophotography Part 2. In this series, later posts will be focused on town & city scenes, light trails and star trails. 

8 minute exposure of the stars over Mt. Rundle at Vermilion Lakes

8 minute exposure of the stars over Mt. Rundle at Vermilion Lakes

I believe that preparation is key to enjoyable and successful night photography. Being prepared with the proper gear, knowing that gear and your location is the best first step toward creating amazing night imagery. 

1 -Invest in a quality tripod - If you already shoot nightscapes even occasionally, you know that a tripod is critical to sharp night photography. The longer exposures you are shooting, the more important that the tripod is strong and sturdy so it won’t move if the conditions are windy. In addition to this, it is important to choose a tripod that is intuitive to you in its use. Being able to easily put the camera on the head and shift its position, especially in the dark is so important. If your tripod doesn’t feel easy for you to adjust, find one that is. It will take so much frustration out of working in the dark. 

2) Pack Your Cable Release/Remote - When photographing long exposures, whether just 1-2 seconds or longer, a cable release will help eliminate any camera shake from pressing the shutter. Get to know your remote and how it works if you will be programming it for a time lapse or long exposure in bulb mode. 

3) Bring a Headlamp and/or Flashlight - Depending on where you will be shooting, be sure to have a headlamp or flashlight to light your way and to help you work with your gear if you get stuck working in the dark. If you are shooting with other photographers, you’ll want to all get set up and try to avoid turning on any lights once you get shooting. Even a little light shining into the foreground can ruin a fellow photographer’s exposure.

4) Know Your Gear Well - Being able to work with your gear in the dark is so important for an enjoyable night shooting experience. If you can adjust your camera on your tripod and access the buttons you need on your camera without fumbling around, you’ll save yourself so much frustration. Know how to change your settings, playback and zoom in to check focus without having to turn on a flashlight. Spending a little time mindfully noticing where all these buttons are can make a world of difference.

Harbour Town on Hilton Head Island as Blue Hour transitions to night.

Harbour Town on Hilton Head Island as Blue Hour transitions to night.

5) Scout your location - Spend time during the day scouting out your location. Being able to see where you will be walking and setting up will help you when it is dark. Additionally, it can help to envision the composition you want to shoot in the daytime. Taking this time will create familiarity with the scene, minimize unexpected obstacles, and aid success in finding an intriguing composition. 

6) Lower Your Screen Brightness & Turn on your Highlight Blinkies - One of the most frequent difficulties with night photography is underexposed images. It is easy to look at your LCD screen on playback and think your image is well exposed when in reality is it underexposed. Lowering the screen brightness is helpful in preventing this mistake. Checking the histogram for proper exposure is the second important step. Using the highlight blinkies on your LCD is another helpful tool to use to ensure the brightest areas of your night scene (e.g. stars, city lights, etc) are not blown out. Check your camera manual to learn how to turn down the brightness and enable the highlight warnings. 

7) Prepare for the Elements - Depending on where you are shooting you may run into various weather conditions. In the summer months, some areas could get buggy at night so you may want to have bug spray on hand. In cooler months, and even in some climates, such as the mountains, the night temperatures get far cooler than the days. Be prepared with layers to keep yourself warm. If you will be in wet areas, waterproof shoes might be helpful, or hiking boots for slippery and uneven terrain. 

8) Be safe - In the city or the wilderness, night time has its dangers. In both cases, it is important to be safe by being aware of your surroundings and it is always best to have a friend for shooting partner with you. 

Chicago River at Night

Chicago River at Night

Night Photography Part 2 coming next week!


Kristen Ryan is an award winning and published landscape and fine art photographer and educator residing in the Midwest suburbs of Chicago. All images are available for purchase in the Fine Art Store or by request. Kristen leads ladies landscape photography retreats in the TetonsChicago, and the Canadian Rockies, offers private mentoring and teaches an online landscape photography workshop, The World Around You. The next run of The World Around You begins August 17!

4 Tips for Capturing Mother's Nature's Atmosphere Part 2


A couple weeks ago I posted an article encouraging you to get out and capture Mother Nature’s Atmosphere in the fog, snow, rain and frigid temperatures. I believe that dramatic and inclement weather can create incredible opportunities for some of the most unique and compelling nature images. These moments happen amongst stormy skies and when the weather clears just enough to let light through. I also believe that even in what appears to be a dreary day, there is beauty to be found if we open our minds and think creatively to see the extraordinary in the ordinary.

So today I have 4 tips for capturing Mother Nature’s Atmosphere:

1) Let go of Expectations -

Head out with an open mind and without expectation for what you will capture. As a general rule, I try to do this whenever I go out to shoot but I think it is especially important when the weather is behaving unpredictably. Sometimes we can have a particular kind of beauty or image in our heads and that can blind us from seeing a different kind of beauty right in front of us. 

The image below is captured at the iconic Oxbow Bend on a winter’s morning in 2016. Beyond these trees is typically where you would see Mt. Moran but on this morning, you would not know the Tetons were there. Instead of driving past, I captured the beauty of the mist and snow among the trees. While I hoped for a different view that morning, I made the most of what WAS in front of me and I really love the winter magic in this image.

Winter's Glory KRP-001.jpg

2) Consider Different Focal Lengths & Perspectives - As landscape photographers, we are often drawn to the grand view and wide angle scenery.  Sometimes the beauty will be in the expansive scene. But often we can find it in smaller segments of the landscape.  

An overcast evening with low lying clouds at Emerald Lake in Yoho National Park created a beautiful atmosphere surrounding the Emerald Lake Lodge & its iconic restaurant view. Across the lake I was drawn to the way the low clouds mixed in the tr…

An overcast evening with low lying clouds at Emerald Lake in Yoho National Park created a beautiful atmosphere surrounding the Emerald Lake Lodge & its iconic restaurant view. Across the lake I was drawn to the way the low clouds mixed in the trees and reflected in the still waters of Emerald Lake. While I captured the wider view and loved it, I also used my telephoto lens to capture a smaller and more detailed scene. This is one of my favorite recently edited images.

One of the days of the September 2019 Magic in the Tetons retreat was extremely overcast and rainy. While we enjoyed a little extra sleep and a nice breakfast in town together, we also were determined to find some beauty in the day. The sky above wa…

One of the days of the September 2019 Magic in the Tetons retreat was extremely overcast and rainy. While we enjoyed a little extra sleep and a nice breakfast in town together, we also were determined to find some beauty in the day. The sky above was pretty dreary but the low clouds were beautiful as they floated through the evergreen trees. I grabbed my Sigma 150-600 to capture the atmosphere on the side of the mountainside. As much as I love my Teton views, this is one of my favorite images from the retreat. And I love how it shows the beauty we found even in some of the dreariest conditions.

3) Be Patient - Sometimes Mother Nature’s dramatic weather is spectacular in an obvious way, such as when a storm is brewing and the ominous clouds are passing over the mountains or ocean in the distance and you can comfortably capture the incredible drama. Other times, she brings consistent rain or overcast clouds. There are days the cloud cover or rain simply does not let up, but holding patience for a partial clearing, or even a single moment of light, can lead to incredible images. In those brief periods of light between the dreary skies, or waiting out the downpours, we can find amazing beauty. Sometimes even a lackluster sunset can become colorful a short while after the sun goes below the horizon.

While in Turks & Caicos, my husband and I rode our bikes 3 miles to the edge of South Caicos for sunrise one morning. While we were there, we got caught in a downpour and we ran off to an abandoned building for shelter. Instead of leaving, we wa…

While in Turks & Caicos, my husband and I rode our bikes 3 miles to the edge of South Caicos for sunrise one morning. While we were there, we got caught in a downpour and we ran off to an abandoned building for shelter. Instead of leaving, we waited out the rain as I was hopeful that the clearing of the clouds would create some beautiful light. Not only did we get a bit of clearing, but we also got a beautiful rainbow, and actually a hint of a double rainbow too!

On this evening of the Magic in the Tetons retreat, we arrived a little before sunset to rather cloudy skies. I found the intense blue clouds and yellow fall foliage to be a stunning contrast. Sunset itself was quite lackluster but we held on for aw…

On this evening of the Magic in the Tetons retreat, we arrived a little before sunset to rather cloudy skies. I found the intense blue clouds and yellow fall foliage to be a stunning contrast. Sunset itself was quite lackluster but we held on for awhile just waiting well past when the sun went below the horizon. Our patience paid off as about 20 minutes after ‘sunset’, this incredible pink appeared in the sky, enhanced by the long exposures we were shooting.

4) Get Out There! 

Even when the forecast is questionable, get out there anyway! Yes, sometimes you may get skunked but quite often you’ll find unexpected beauty or the weather will break at just the perfect moment. There have been so many times I have gone out in rain, freezing rain, or overcast clouds wondering if the shoot would be a bust and come home with images I love. In some cases Mother Nature surprised me by bringing a well timed clearing or beautiful colors in the clouds. Other times I found beauty in unexpected ways.  

On this day in Banff National Park, the clouds covered the mountains and the sky was dreary and overcast, but a brief window of light came along at the perfect time over Bow Lake. In the drive from Lake Louise to Bow Lake, the clouds left little hop…

On this day in Banff National Park, the clouds covered the mountains and the sky was dreary and overcast, but a brief window of light came along at the perfect time over Bow Lake. In the drive from Lake Louise to Bow Lake, the clouds left little hope of finding this beauty, but there it was. Worth the effort!

As my friends and I drove 20 minutes from Dana Point, CA to Crystal Cove, the rain came down on us. We knew our efforts may be in vain, but we were only there for one more night and we wanted to make an effort. This was also an outing to see this pl…

As my friends and I drove 20 minutes from Dana Point, CA to Crystal Cove, the rain came down on us. We knew our efforts may be in vain, but we were only there for one more night and we wanted to make an effort. This was also an outing to see this place that was so special to my friend, Brynn Schmidt. As we parked, the rain was beginning to let up and we could see the makings of incredible light. We practically sprinted to the beach and could barely set up our tripods fast enough. I don’t think we even spoke to each other for 30 minutes and we raced to capture the beauty in front of us. When we left our hotel earlier that afternoon, this sunset would never have been what we predicted. Go out anyway! It won’t pay off every time, but sometimes it will.

Lose your expectations, open your mind, practice patience and perseverance! Capture the beauty of Mother Nature’s atmosphere! 

While at the moment, many places are off limit to us as we ‘social distance’ and ‘shelter in place’, I look forward to when I am able to travel again, both locally and across the world. In the meantime, I am traveling virtually through my image catalog and finding many images yet to be edited. I’m storing away my ideas and inspiration for the day I can travel again and hope you do too! In the meantime, reach out to me if you' have any topics you’d like to read about as we shelter in our homes. Stay healthy!


My online landscape photography workshop, The World Around You, is now open for registration! Sign up at Click Photo School.


Kristen Ryan is an award winning and published landscape and fine art photographer and educator residing in the Midwest suburbs of Chicago. All images are available for purchase in the Fine Art Store or by request. Kristen leads ladies landscape photography retreats in the TetonsChicago, and the Canadian Rockies, offers private mentoring and teaches an online landscape photography workshop, The World Around You.

Embracing Mother Nature's Atmosphere

Mother Nature is not always cooperative in providing beautiful sunrises, sunsets, and days with blue skies and white puffy clouds. Sometimes she sends us stormy and inclement conditions like rain, snow, and fog. While all of these things can provide challenging circumstances, they often create the most atmospheric and unique landscape imagery. So instead of hiding inside, grab the camera and embrace the atmosphere. 

Three atmospheric conditions to capture:

1) Fog & Low clouds

Fog can be challenging as it creates low visibility, difficulty driving and may obscure the beautiful views you find in the mountains or along the coast, for example. On the positive side, fog can create a sense of mystery, enhance atmosphere and provide a soft, dreamy mood. In obscuring some details, fog enhances the beauty of other details and creates a stunning contrast to finer and rougher textures, such as the hard rock of mountain tops or the needles of pine trees. Fog may isolate foreground objects like trees, flowers or animals from the background, simplifying the scene.

Pond & Tree in the fog Kristen Ryan Photography-001.jpg

2) Snow & Frigid Temperatures

My guess is most won’t need a lot of encouragement to get out there on those beautiful winter days when big puffy snowflakes are falling. There is something truly magical about falling snow. Even in heavily falling snow, the views can be beautiful. The snow often comes with a drab white sky, but the foreground is enhanced by the atmosphere created with fresh snowflakes.

Snow on the Snake-001.jpg

Many people shy away from the extremely frigid temperatures you that sometimes come after a beautiful snowfall. I encourage you to prepare for the cold with many layers and grab those hand and toe warmers because the icy temperatures often lead to unique ice formations and extra sparkly snow. 

Frosty Vermilion Lakes Kristen Ryan Photography-001.jpg
Pond with Icy Trees web_preview.jpeg

3)  Rain

A hard drenching downpour is not going to provide you with the most enjoyable shooting conditions nor create the most pleasing images. However, rain in many situations can create opportunities for stunning imagery. Storms coming in or clearing up can create extremely dramatic skies.

Snake River moody fall.jpg

In many places where you can see miles in every direction, the distant rain is stunning to capture. 

Rain comes down in the distance among the golden sunrise light off the coast of Turks & Caicos.

Rain comes down in the distance among the golden sunrise light off the coast of Turks & Caicos.

Even light rain as it splatters on the water of a lake or on puddles can create a beautiful story not typically captured.

Rain on String Lake KRP **-001.jpg

And if you’re lucky, rain that is short lived may even reward you with a rainbow in the end! 

After watching the rain come in, my husband and I ran for cover. As it lightened, I looked back and knew we’d see a rainbow! So worth getting a little wet!

After watching the rain come in, my husband and I ran for cover. As it lightened, I looked back and knew we’d see a rainbow! So worth getting a little wet!

In most situations, beauty can still be found when Mother Nature throws us some precipitation and inclement weather mixed with just a small breakthrough of the sun can create the most astounding images! Do you have a dramatic weather image you love? I’ve love to see them!


My online landscape photography workshop, The World Around You, is now open for registration! Sign up at Click Photo School. This will likely be the only run of 2020 as my fall is filled with retreats.


Kristen Ryan is an award winning and published landscape and fine art photographer and educator residing in the Midwest suburbs of Chicago. All images are available for purchase in the Fine Art Store or by request. Kristen leads ladies landscape photography retreats in the TetonsChicago, and the Canadian Rockies, offers private mentoring and teaches an online landscape photography workshop, The World Around You.