


Last week I shared some tips for getting prepared for night shooting whether cityscapes or astrophotography. Night is one of the most beautiful and dynamic times to shoot in the city. I hope these technical tips will help you to capture some incredible night city scenes.
1) Shoot in RAW - The best way to get the most information in your files and therefore the best quality photographs is to shoot RAW. Exposure and white balance both can be tricky with night photography and the more information you collect while shooting, the more leeway you will have when you get into post processing for adjustments.
2) Low ISO - While astrophotography generally calls for a high ISO since it requires very dark skies for visible stars, the lights of towns and cities create an overall brighter scene. This allows for a low ISO to help reduce noise in your images. Depending on the available light as well as my aperture and shutter speed choices, my ISO is typically between 200 and 800.

Buckingham Fountain during Blue Hour
3) Manual Focus - Focusing manually is the best way to ensure sharp focus in night photography. If you are close enough to lights and points of contrast, I find autofocus can work quite well, but as it gets darker, when you are further away from the scene, or when you are using a wide angle lens, autofocus will often miss the mark. Even if you think autofocus is working for you, I recommend using live view and zooming in on a point of contrast and manually tweaking the focus until sharp.
4) White Balance - Choice of white balance at night can be a bit tricky. The night shadows tend to be very cool but the city lights are very warm. Be aware of this dichotomy and try to balance out the intensity of the warm lights with the cool shadows. Like all imagery, choice of white balance is subjective for the look and mood you want to portray so you may have a preference for warmer or cooler tones. Using live view can often help me find my happy place with the color. If your camera’s auto white balance does a good job, that can often be a great choice as well.

Telephoto capture of part of the Chicago skyline
5) Bracket exposures - Night city scenes present a challenge as they have a high dynamic range to capture. The lights of buildings and vehicles are quite bright while the shadows are dark, making the dynamic range more than cameras can capture in a single exposure. Bracketing exposures by programming your camera or by adjusting your settings manually is the best way to ensure you capture detail in both the shadows or highlights.
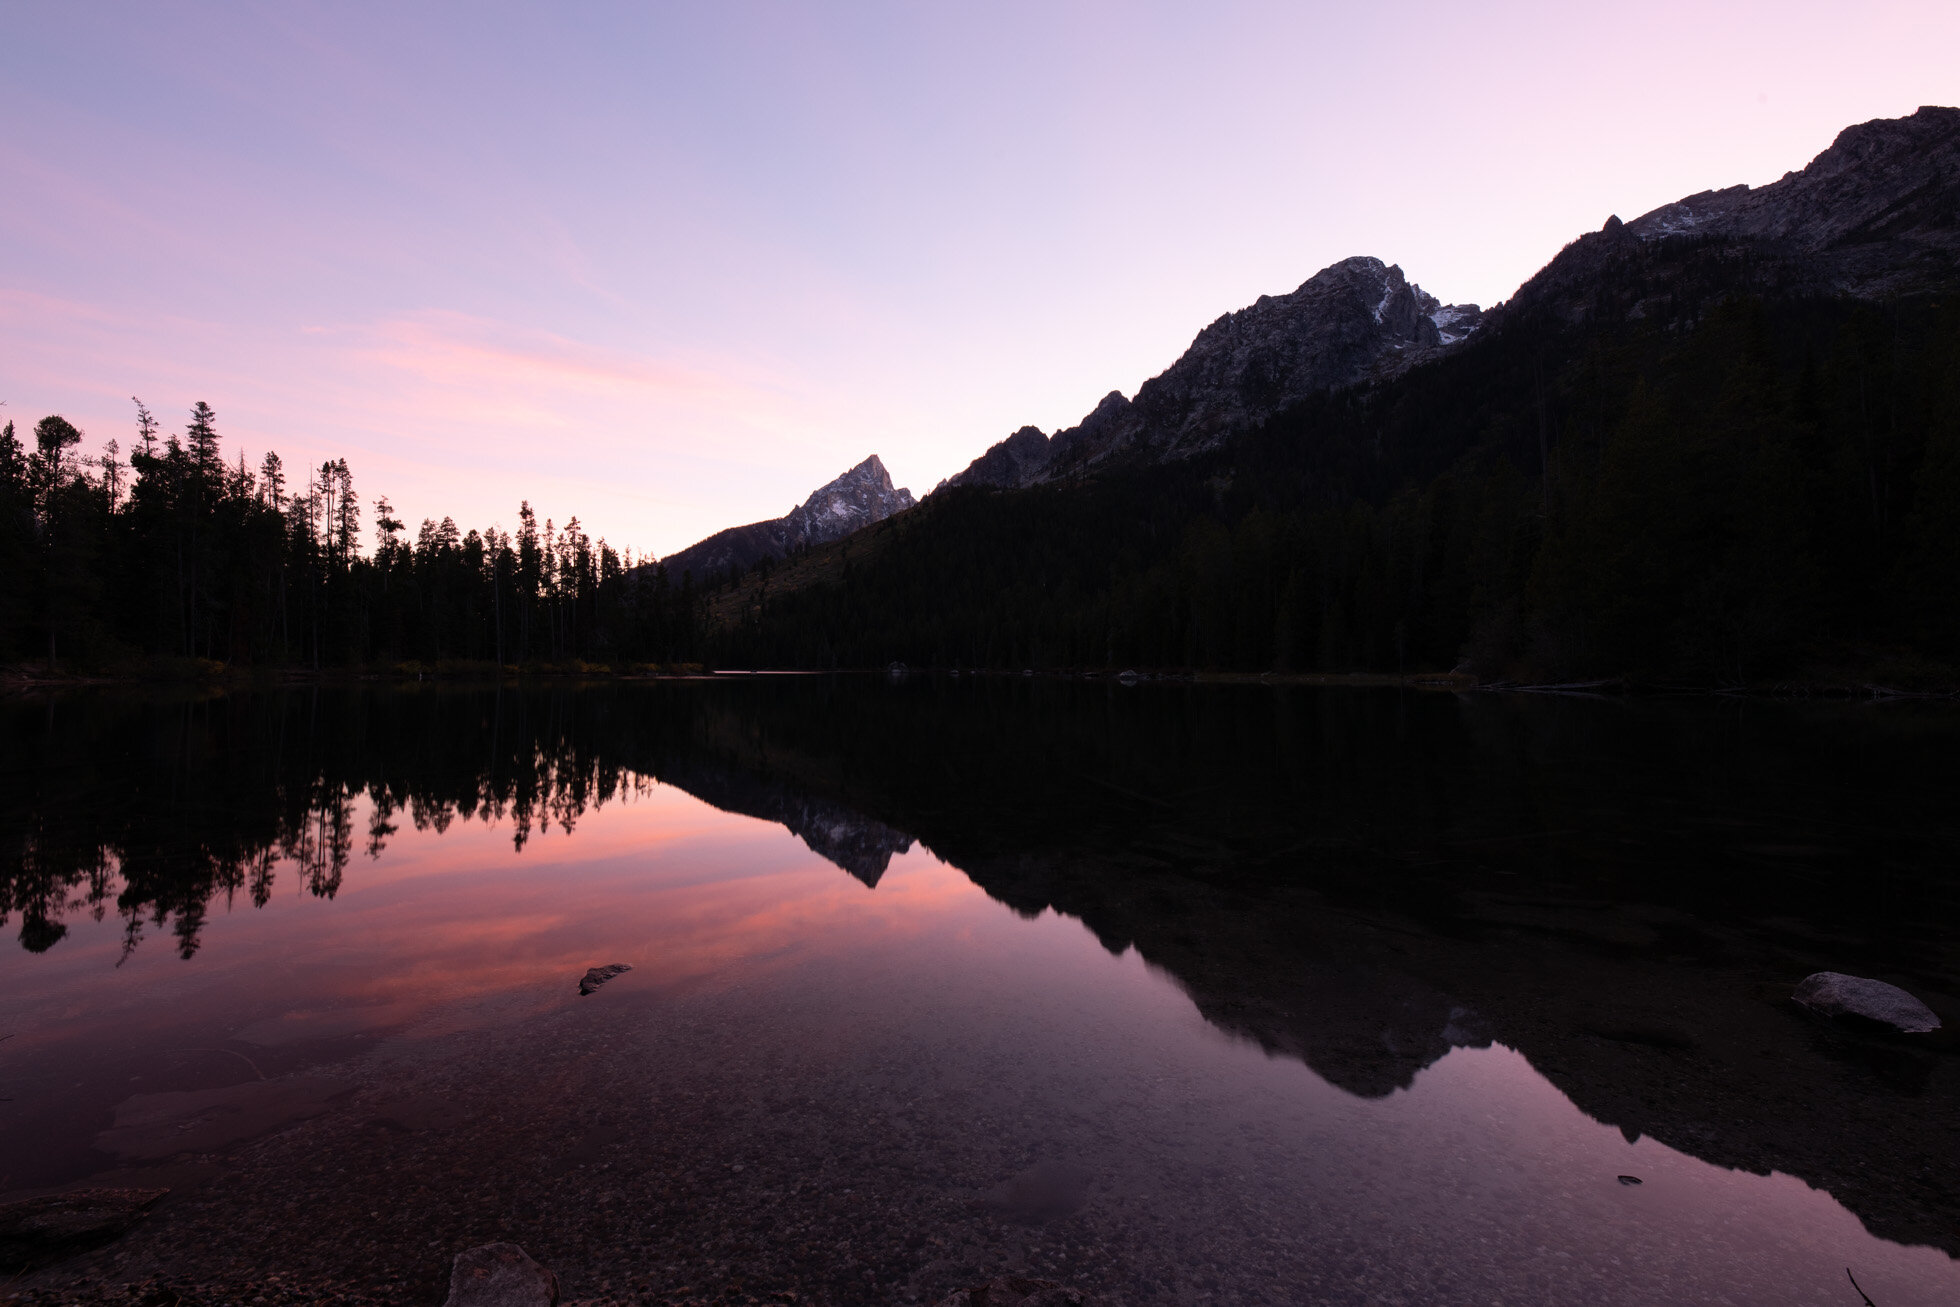
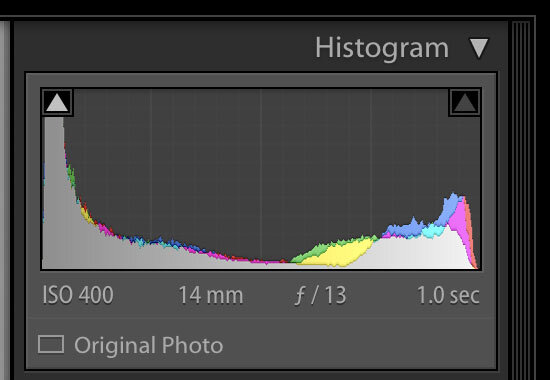
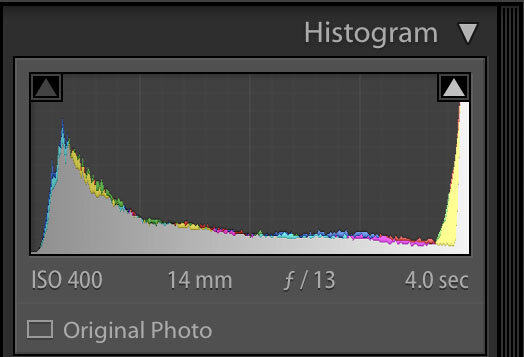
6) Histogram - Use your histogram to help you evaluate your exposure. Your LCD screen is not a great way to check exposure which is why I recommended in Part 1: Preparation to turn the brightness down. This way it won’t trick you into thinking you have proper exposure when you don’t. With the high dynamic range, check your highlights and your shadows to ensure you have detail in both. Refer back to those bracketed exposures. If your brightest bracketed exposure still has clipped shadows, brighten it up. If your darkest bracketed exposure still has blown highlights, reduce the exposure. While sometimes you may find you can recover enough information to make a single exposure work, it is always best to gather as much information in the field as you can.

Williamsburg Bridge from Brooklyn
7) Take Test Shots - Don’t be afraid to take test shots and examine them for focus, exposure and white balance. Examine them to consider your composition as well to see if you have included distracting elements or cut off important lines or features. Zoom in to check for sharp focus. Check your histogram for the dynamic range. Check to see if your images are excessively warm or cool.
8) Create Starbursts of City Lights - Close your aperture down to capture starbursts of those city lights. F/16 its a great number to aim for. If you need more light, in this image below I was able to get the starburst of this rotating lighthouse light at f/13.

Harbour Town at night with an aperture of f/13 to get the starburst of the lighthouse light!
9) Arrive Early - Getting to your location for sunset will allow you to take your time in setting up and evaluating different compositions. This will also give you the opportunity to shoot through varying lighting situations of sunset, blue hour and true night skies. A stunning time to capture is when the lights first come on in the city!

Part of the Chicago skyline as the sky transitions to night and the city lights are turning on!
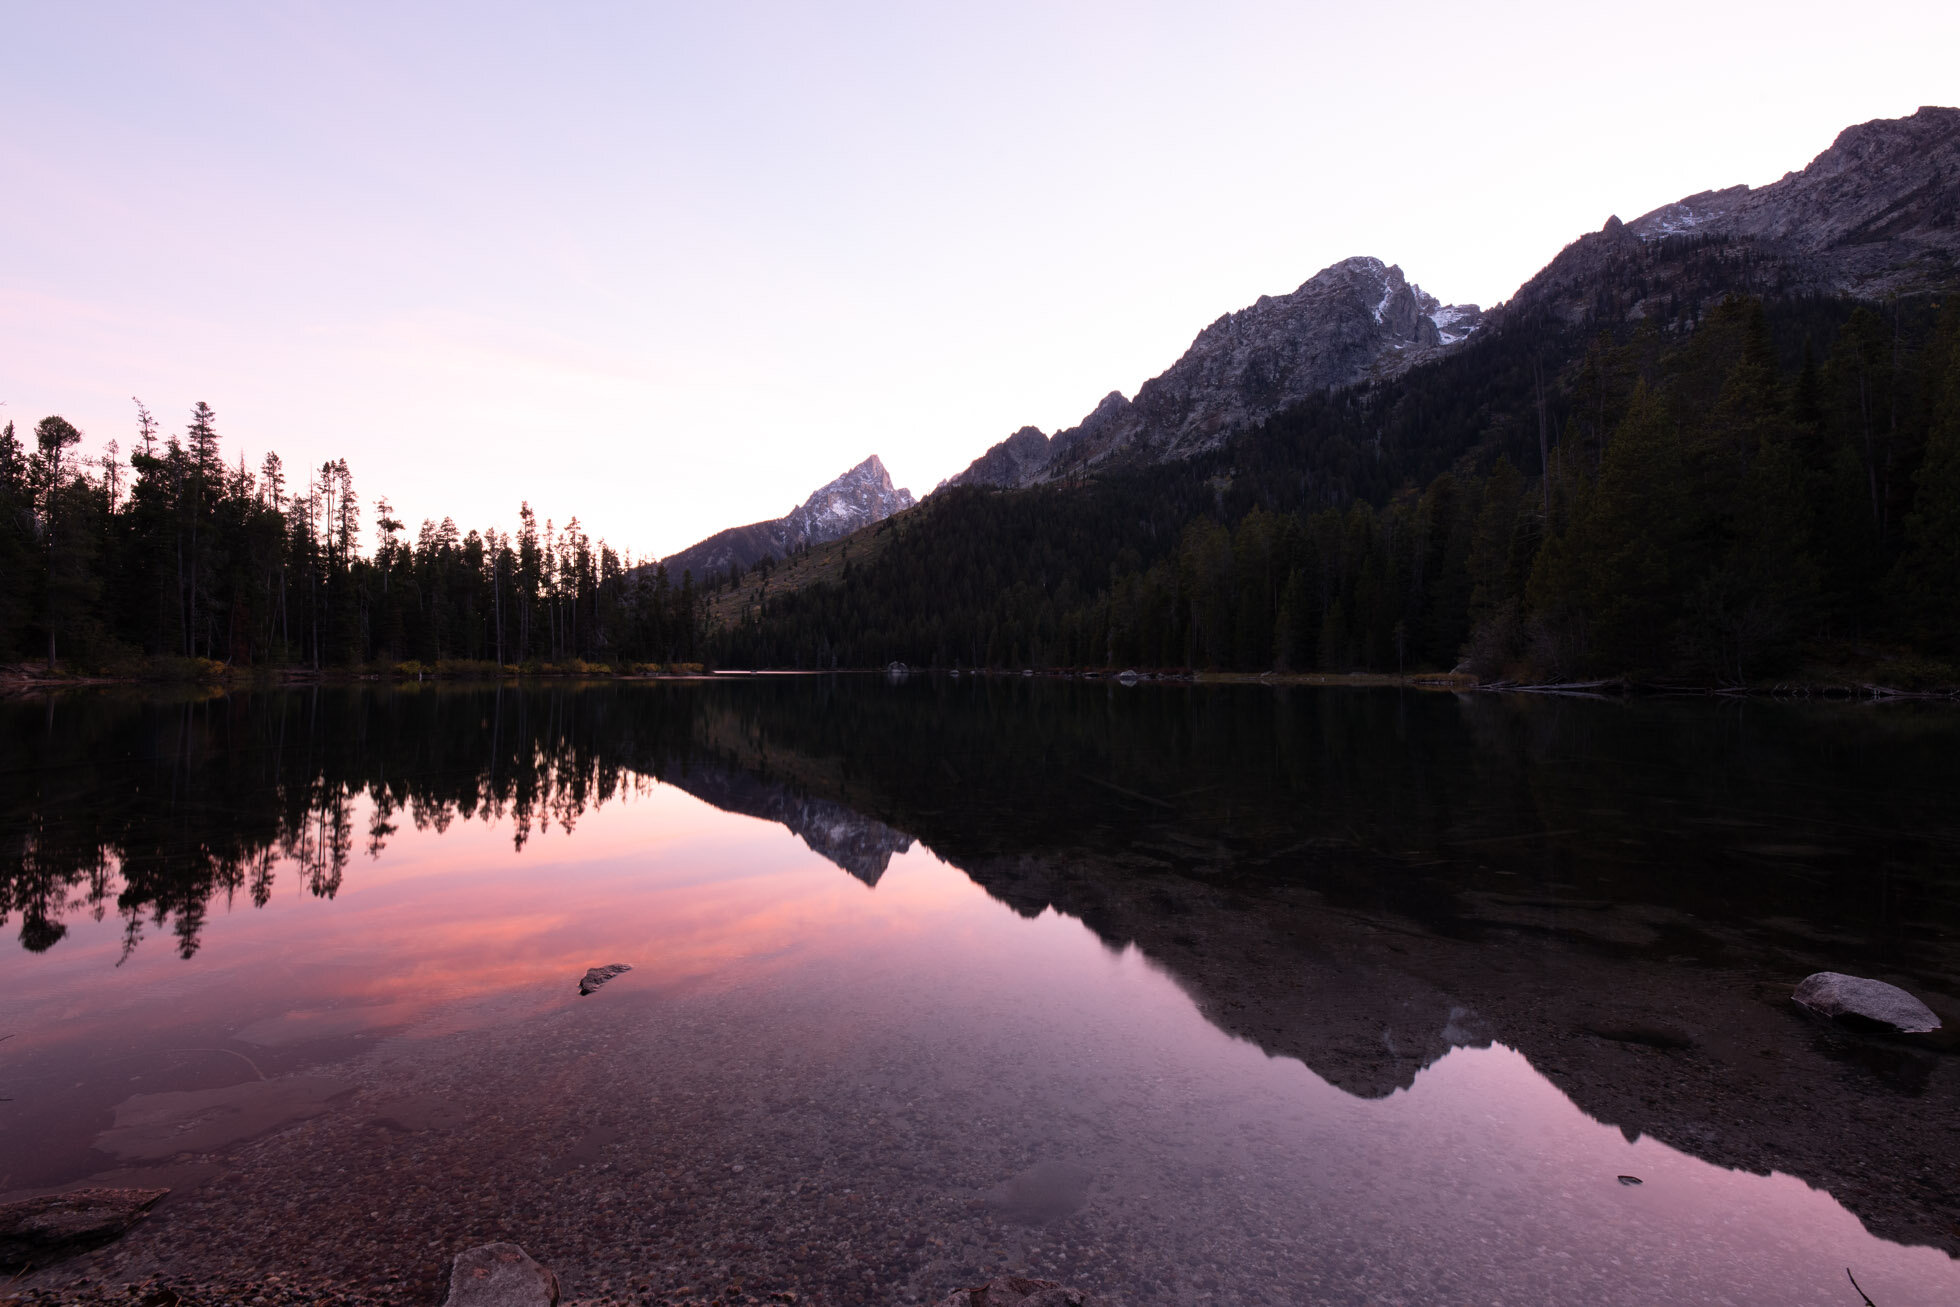
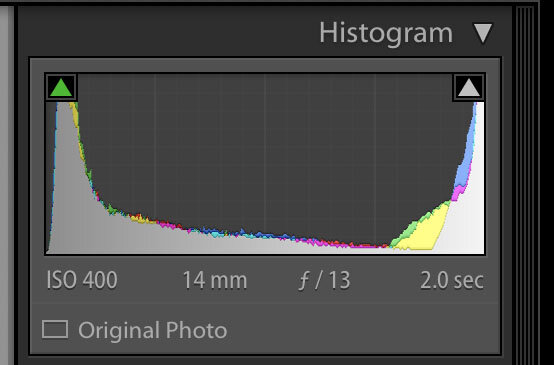
These tips can also be used in a smaller downtown or even in a rural area when shooting a lit up building amongst darker skies such as this scene below at Emerald Lake.
Next week’s topic in the Night Photography Series is Light Trails, so keep an eye on your inbox!
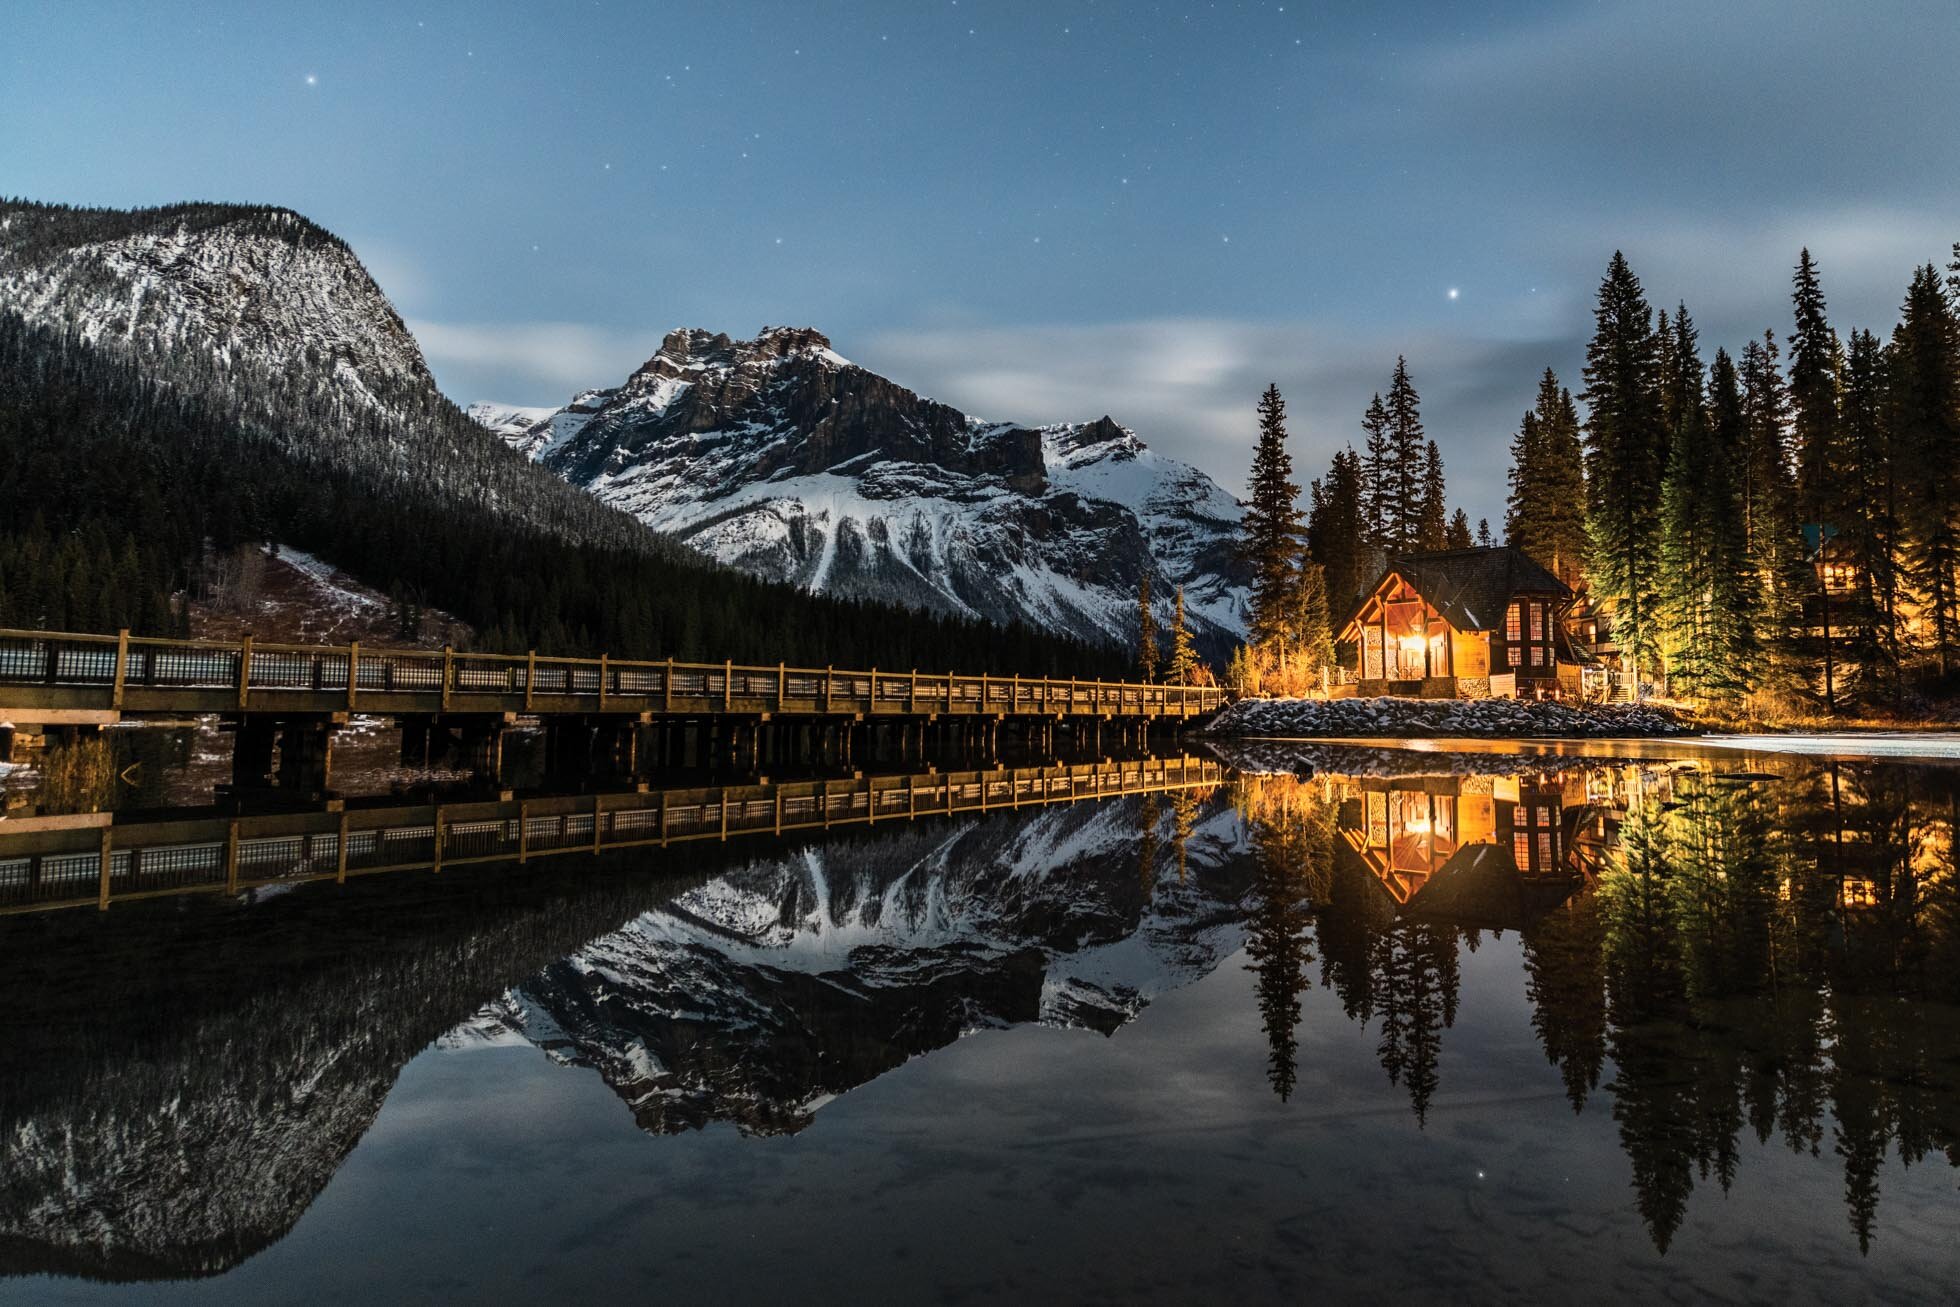
This kind of environment mixes an astrophotography approach with a city scene approach. The ISO in this image is 800. Shooting in this kind of scene without the bright restaurant would require a much higher ISO. Additionally, this is a situation of merging exposures and balancing white balance for the cool sky and the warm restaurant lights.
Kristen Ryan is an award winning and published landscape and fine art photographer and educator residing in the Midwest suburbs of Chicago. All images are available for purchase in the Fine Art Store or by request. Kristen leads ladies landscape photography retreats in the Tetons, Chicago, and the Canadian Rockies, offers private mentoring and teaches an online landscape photography workshop, The World Around You. The next run of The World Around You begins August 17!