4 Ways To Use Shutter Speed For Creative Seascapes

There is something truly magical about the ocean! The movement and sound of the waves crashing along the shore is mesmerizing. The ocean is one of my favorite subjects to photograph because getting creative with shutter speed can keep me experimenting for hours.

There are 4 ways I used shutter speed to create different effects with my seascapes!

1) Fast Shutter Speed - Sometimes the texture of the crashing or cresting waves grabs my eye and instead of softening the water, I want to emphasize the texture and power of the ocean by freezing the movement with a fast shutter speed.

1/2000s shutter speed to freeze the motion of the crashing wave. Photographed at 360mm with the Sigma 150-600mm Contemporary Lens.

2. Slow Shutter - One of my favorite shutter speed choices with ocean waves is in the range of .4 seconds to 2 seconds. In this range, the movement of the water is softened somewhat but texture and shape is still evident. With these shutter speeds, the look of the water can change with just small changes in exposure length.

With these shutter speed ranges, a 6 stop ND filter is my go to choice and a tripod is necessary for keeping the camera stable.

1/4 second exposure capturing the movement and texture in the crashing waves

3) Much Longer Exposures - A third creative choice photographing the ocean is to use much longer exposures to smooth out the water completely and create a really soft and dreamy look. Here I am referring to shutter speeds generally of 10 seconds and longer. When we get even longer, with shutter speeds of 30 seconds and more for example, we also get the benefit of getting dreamy movement in the clouds too. When I photograph exposures from 10 to 30 seconds, a 10 stop filter is my go to ND filter. If working in bright daylight hours, more than 10 stops may need to be blocked to get 30 seconds or longer. In these situations, I will use a 15 stop filter or stack filters to extend the time. Be sure to make sure your tripod is stable for these longer exposures. If the water flows up over the legs, it can move just enough to blur the image.

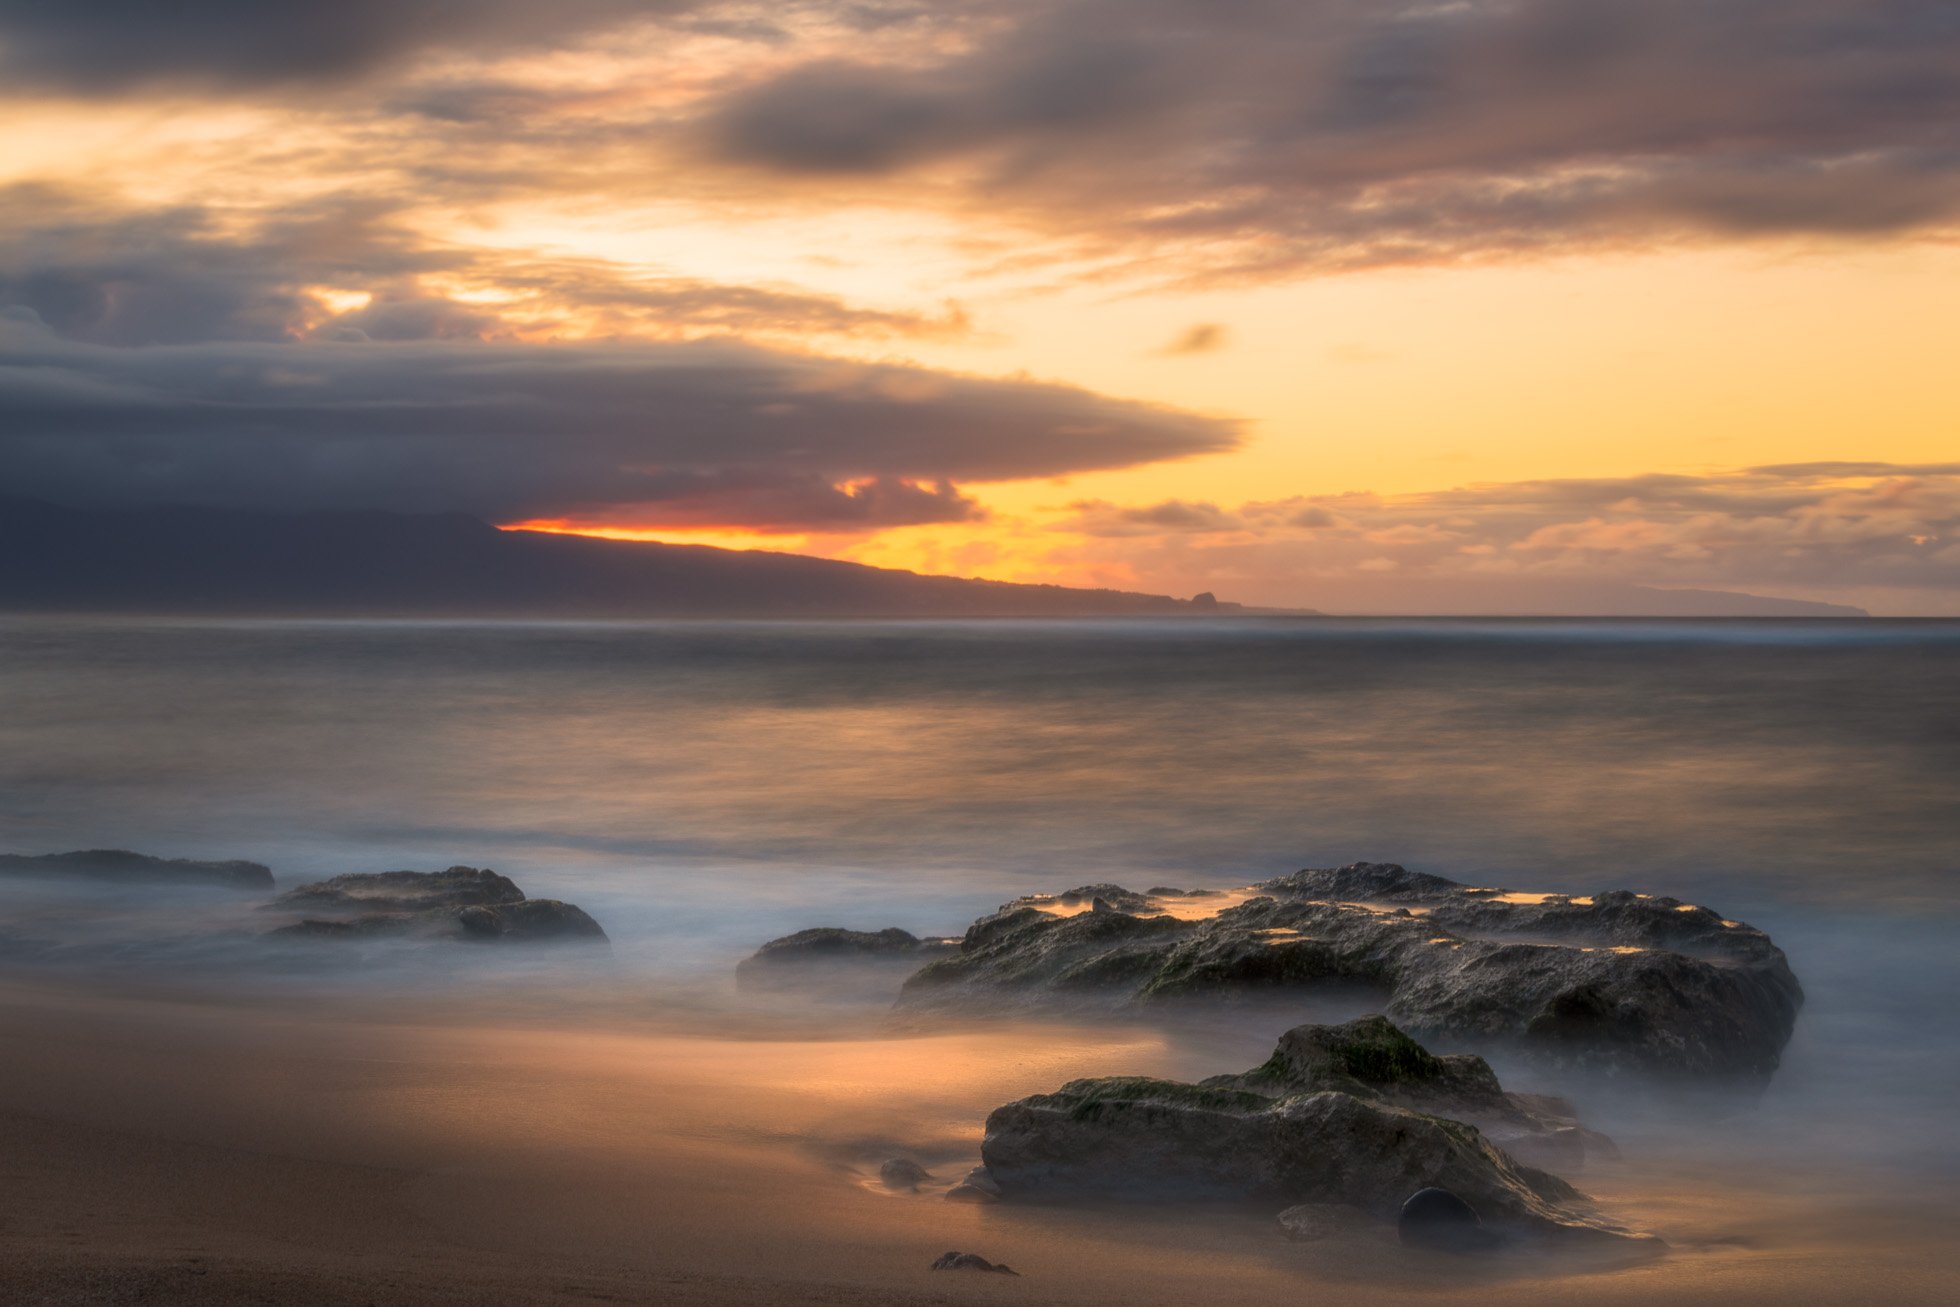
15 second exposure for a dreamy and soft feel in the water

4) Intentional Camera Movement - the fourth way I love to shutter speed creatively is to combine a slower shutter speed with intentional camera movement. This movement creates an abstract and painterly feel to the ocean. My preferred shutter speed range for ICM is .5 seconds to 1 second because it allows me to control if I move fast or slow as well as how much I move the camera over this time period. I generally use a 6 stop ND filter to get my shutter speed in this range. If I am without a filter, it is possible to use intentional camera movement with somewhat faster shutter speeds with success and I don’t hesitate to do so. I simply prefer the .5s to 1 second range . Check out Seascape Panning for more information on using this technique.

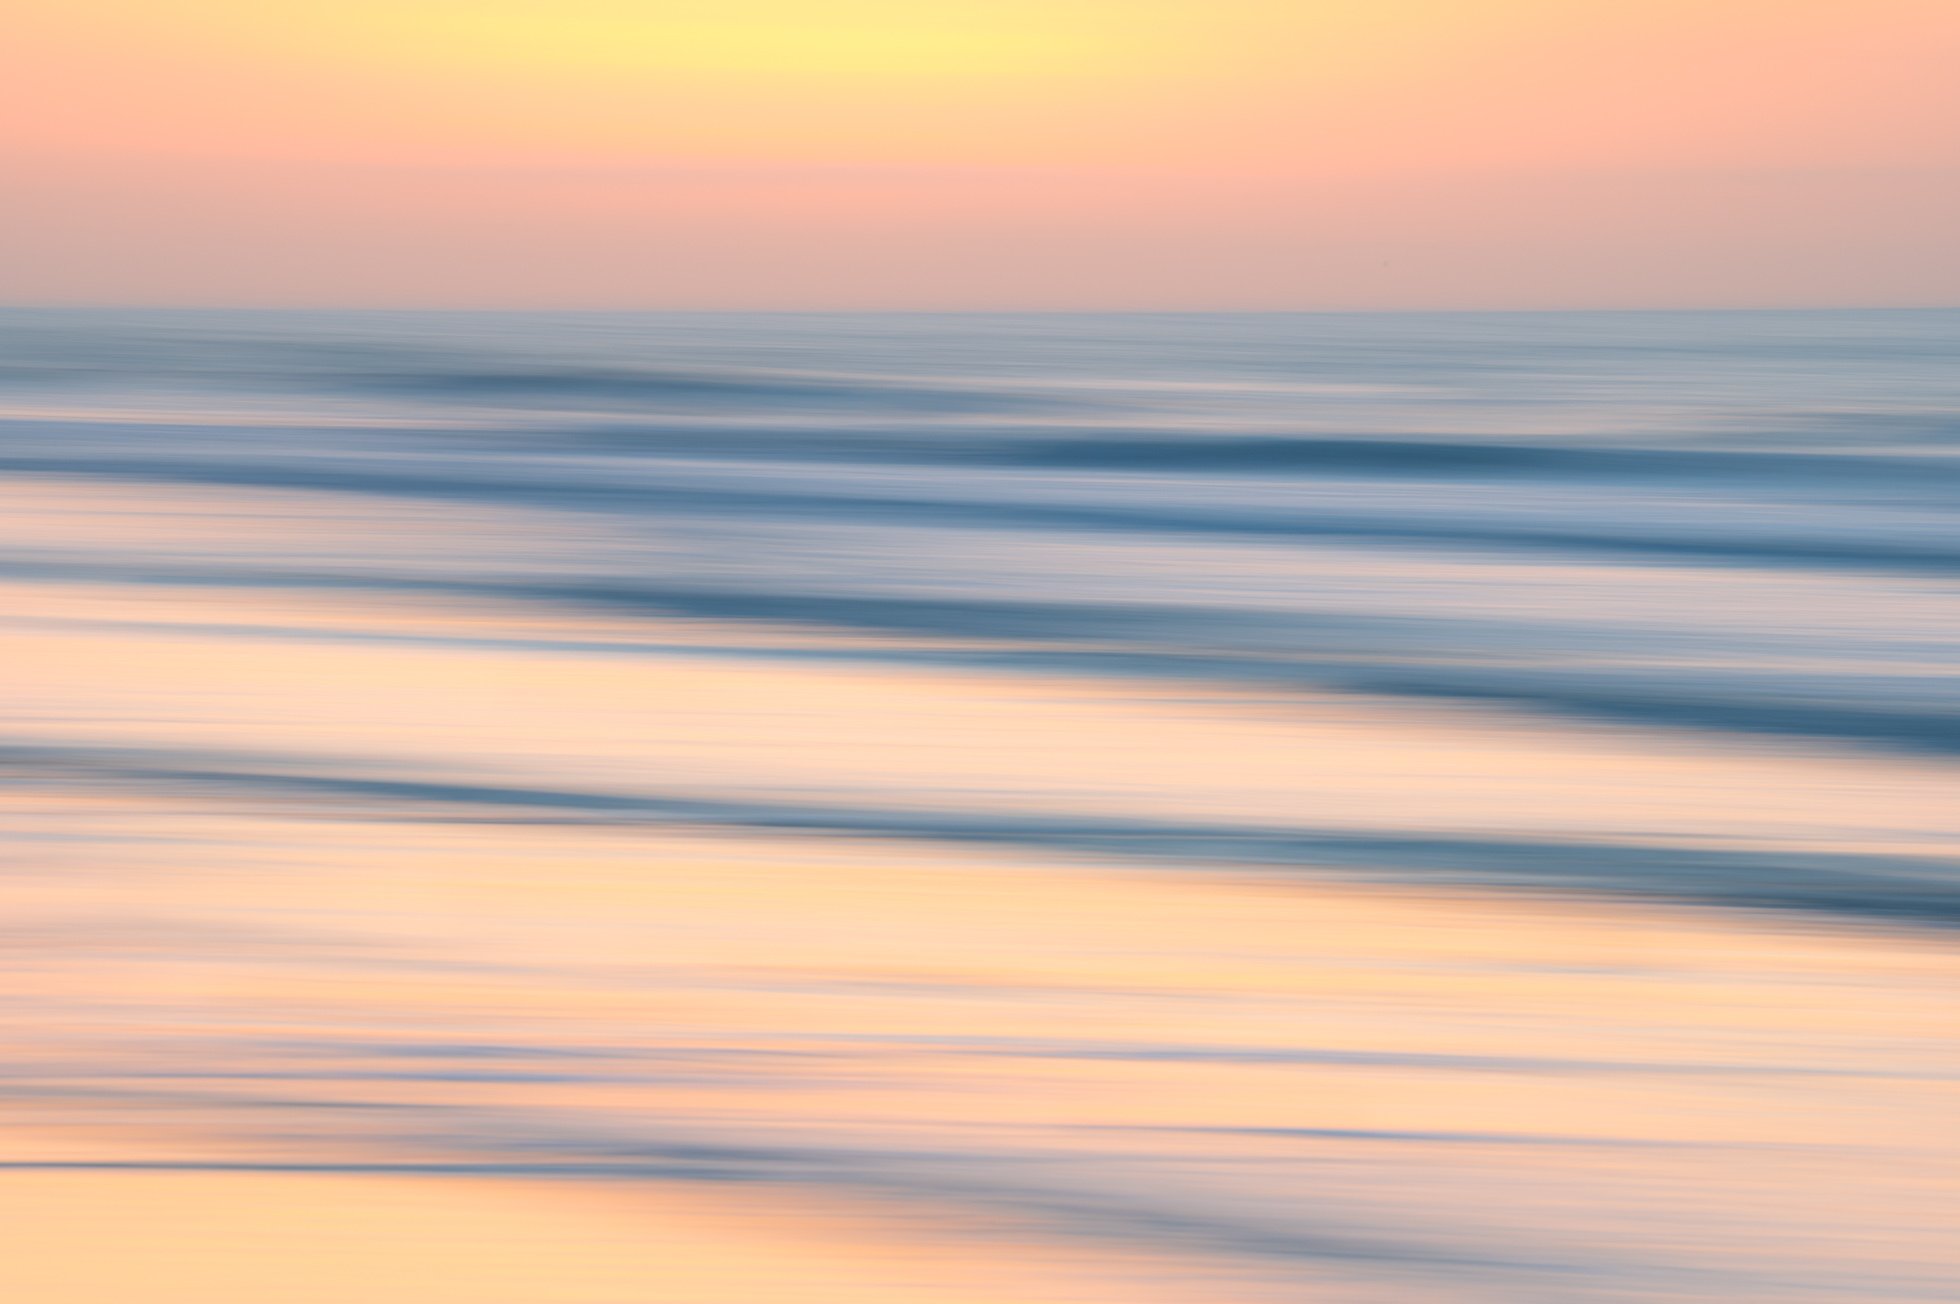
1/4 second of intentional camera movement with the Sigma 150-600mm Contemporary Lens at 220mm

Experimenting with all these different ways of photographing the water can keep me busy with the ocean for hours! Can’t wait to get back there again!


Kristen Ryan is an award winning and published landscape photographer and educator residing in the Midwest suburbs of Chicago. All images are available for purchase in the Fine Art Store or by request. Kristen leads ladies landscape photography retreats in the Tetons, Glacier NP, Hilton Head,  Chicago, and the Canadian Rockies, offers private mentoring . New online educational materials are coming soon!


The Neutral Density Filter I use to photograph long exposures are from Breakthrough Photography.**


** affiliate link

One Piece of Gear that is a Game Changer

One thing we discover as we get into landscape photography is that it tends to encourage more and more gear accumulation. Tripods, filters, remotes, etc. It seems there is always something more to purchase and add to our ‘need’ or ‘want’ list! It can be hard to decide which gear is truly worth the expense.

If you are into long exposure photography or astrophotography, there is one piece of gear that is a total game changer. That item is an “L Bracket”. This little piece of metal is in the shape of an L and it screws onto the bottom of your camera where you would screw on the tripod plate. It replaces the plate and stays on your camera tightly unless you take it off. It adds a small amount of weight and bulk but minimally so and is well worth the benefit. 

The L Bracket allows you to place your camera securely in either horizontal OR vertical orientation. In my experience, long exposures with a typical tripod plate are frequently lacking sharpness, especially with a heavy camera and lens combination. This is because when the ball head is turned to shoot vertically, the weight of the camera causes it to slip and even the slightest movement will create blurriness in our images. The L bracket allows the camera to sit securely on top of the tripod without moving during long exposures.

The ability to shoot portrait orientation long exposures is especially helpful in situations such as shooting tall waterfalls or astrophotography when you want to capture the height of the sky and Milky Way. It is also helpful in keeping the camera composition steady when utilizing focus stacking in a vertical orientation. As a bonus, I find my camera is more secure on my tripod with the L bracket than the tripod plate regardless of whether I’m shooting horizontally or vertically.

The L bracket also means you don’t have to worry about forgetting your tripod plate because it will always be ready to mount on the tripod. The little allen wrench fits in a space at the bottom of the L bracket so it is always there if an adjustment is needed. Be sure to purchase an L bracket specific to your camera model and make sure it works with the ball head on the tripod. Just check the details online when you purchase or ask the camera store you are purchasing from. 

Milky Way capture in September 2019 using my D850 and Kirk L bracket

Milky Way capture in September 2019 using my D850 and Kirk L bracket

I hope you find using an L bracket to be helpful in your landscape and night photography!


Kristen Ryan is an award winning and published landscape and fine art photographer and educator residing in the Midwest suburbs of Chicago. All images are available for purchase in the Fine Art Store or by request. Kristen leads ladies landscape photography retreats in the TetonsChicago, and the Canadian Rockies, offers private mentoring and teaches an online landscape photography workshop, The World Around You.

The next run of ‘The World Around You’ beings April 20th! Registration opens in early March!

5 Tips for Shooting in Overcast Weather

It’s no secret that I love clouds, as most landscape photographers do. Clouds make a sky far more interesting than a clear blue sky. They create mood and atmosphere. But sometimes the clouds are so thick that the sky becomes gray and overcast, which is not any more interesting than a clear blue sky. What do you do in those situations? I suppose if you are home, you can just sit that one out and spend your day editing or engaging in life outside of photography. But when it happens during a long awaited trip to a dream destination, you want to make the best of it. So here are a few ideas of how to embrace that overcast light.

1) Seek Out Waterfalls or Other Moving Water ~ Overcast light is the perfect time to shoot waterfalls, rivers, or streams. Grab your 6 stop Neutral Density Filter and play with shutter speed and long exposures . The soft, overcast light helps to shrink the dynamic range and eliminates the dappled light and harsh shadows that come with bright sunlight. Bonus in the autumn, overcast light lets you bring out the fall colors without the harsh highlights.

WaterFall Glen Kristen Ryan Photography.jpg

2) Experiment with Slow Shutter and Panning ~ Experimenting with tree panning is a perfect activity for an overcast day. Panning can be done in any light, but in softer light, it will be easier to get a slower shutter speed and avoid bright highlights that come in full sun.

Meadow Panning-001.jpg

3) Fill the Frame ~ Look for some beautiful details in the foreground and fill your frame with them. For example, maybe a mix of fall colors in the foliage or fog floating through the trees. I often use a longer focal length for this kind of shooting.

Trees & Fog Kristen Ryan Photography.jpg

4) Minimize the Sky in the Frame ~ If the sky is not adding interest to the scene, make the foreground the majority of the frame. Place the horizon or tops of trees, mountains or hills near the upper line of the Rule of Thirds or even higher. Typically in these situations I will use a mid focal length or longer focal length rather than my wide angle.

Cannon Beach Fog-001.jpg

5) Underexpose the Sky ~ Sometimes the sky is a pure gray or white blanket over the scene, but other times you might be able to see some texture in the clouds. If you see texture, you can work with it in post processing. By underexposing, you capture more sky detail and can edit to create some moody atmosphere.

Cape Flattery Kristen Ryan Photography-001.jpg


So next time the clouds got you down, remember these tips and get creative. There is always some beauty to be found!


Kristen Ryan is an award winning and published landscape and fine art photographer and educator residing in the Midwest suburbs of Chicago. All images are available for purchase in the Fine Art Store or by request. Kristen leads ladies landscape photography retreats in the TetonsChicago, and the Canadian Rockies, offers private mentoring and teaches an online landscape photography workshop.

Choosing a Neutral Density Filter

Neutral Density filters block light from the camera sensor.  There are many Neutral Density (ND) filters of varying strength which block anywhere from 2 stops to 15 stops of light. In landscape photography, we use ND filters to reduce the light coming into our camera sensor so that we can slow down the shutter speed for creative effect. The ND filters that I always carry in my bag are 6 stop, 10 stop and 15 stop filters from Breakthrough Photography. The one that I need at any given time depends on the light of the scene, the subject I am photographing and the creative effect I am envisioning in my frame. 

1 second exposure in Oahu using a 6 stop Neutral Density Filter from Breakthrough Photography

1 second exposure in Oahu using a 6 stop Neutral Density Filter from Breakthrough Photography

6 Stop Filter 

A 6 stop filter is perfect for a number of situations where you want to reduce your shutter speed in the .4 second to 5 second range.  I use my 6 stop filter when I want to create abstract photos of water or trees by using a panning technique. The 6 stop filter is perfect for photographing waves and water when I don’t want to freeze the motion but I want to keep some shape, texture and detail in the water. This is a technique I love to use at the ocean, lakes or rivers. It is also perfect for smoothing the water of waterfalls to create a soft flow. The longer exposures of 5-10 seconds will create a very smooth effect while less than 5 seconds leaves a little more texture in the water.  In very low light, the 6 stop can allow an exposure of 10 seconds or more, but in brighter light, the 10 stop will be needed. 

.4 second exposure with a 6 stop Neutral Density Filter

.4 second exposure with a 6 stop Neutral Density Filter

1 second exposure capturing the movement of the waves of Lake Michigan using the 6 stop Neutral Density filter

1 second exposure capturing the movement of the waves of Lake Michigan using the 6 stop Neutral Density filter

1 second exposure panning the autumn color in Grand Teton National Park using a 6 stop Neutral Density Filter

1 second exposure panning the autumn color in Grand Teton National Park using a 6 stop Neutral Density Filter

Shutter Painting at Crystal Cove State Park using a 6 stop Neutral Density Filter

Shutter Painting at Crystal Cove State Park using a 6 stop Neutral Density Filter

1.6 second exposure with a 6 stop Neutral Density Filter

1.6 second exposure with a 6 stop Neutral Density Filter

The 10 stop is my go to filter for exposures 15 seconds and longer. In daylight, the 10 stop is needed for these creative long exposures of water or clouds. Imagine those super smooth waters and wispy clouds. Those are when I pull out my 10 stop filter. 

2 minute exposure during sunset with a 10 stop Neutral Density Filter

2 minute exposure during sunset with a 10 stop Neutral Density Filter

3 minute exposure during very early sunrise with a 10 stop Neutral Density Filter

3 minute exposure during very early sunrise with a 10 stop Neutral Density Filter

30 second exposure at Oxbow Bend with a 10 stop Neutral Density Filter

30 second exposure at Oxbow Bend with a 10 stop Neutral Density Filter

The 15 stop filter is the filter I need for creating dynamic wispy clouds during the daylight. This filter will allow me to shoot 3-6 minutes of clouds and capture creative clouds even with slow moving clouds. 

4 minute exposure using a 15 stop neutral density filter from Breakthrough Photography

4 minute exposure using a 15 stop neutral density filter from Breakthrough Photography

Neutral Density filters are an incredible tool for adding creativity to your landscape, seascape and nature photography. I highly recommend Breakthrough Photography* filters for their great quality. Have more questions about choosing a filter, feel free to reach out and ask me! I’m always happy to help.


Kristen Ryan is a landscape and fine art photographer residing in the Midwest suburbs of Chicago. All images can be purchased in the Fine Art Store. Kristen leads ladies landscape photography retreats in the TetonsChicago, and the Canadian Rockies, offers private mentoring and teaches an online landscape photography workshop twice a year.

*Affiliate Link