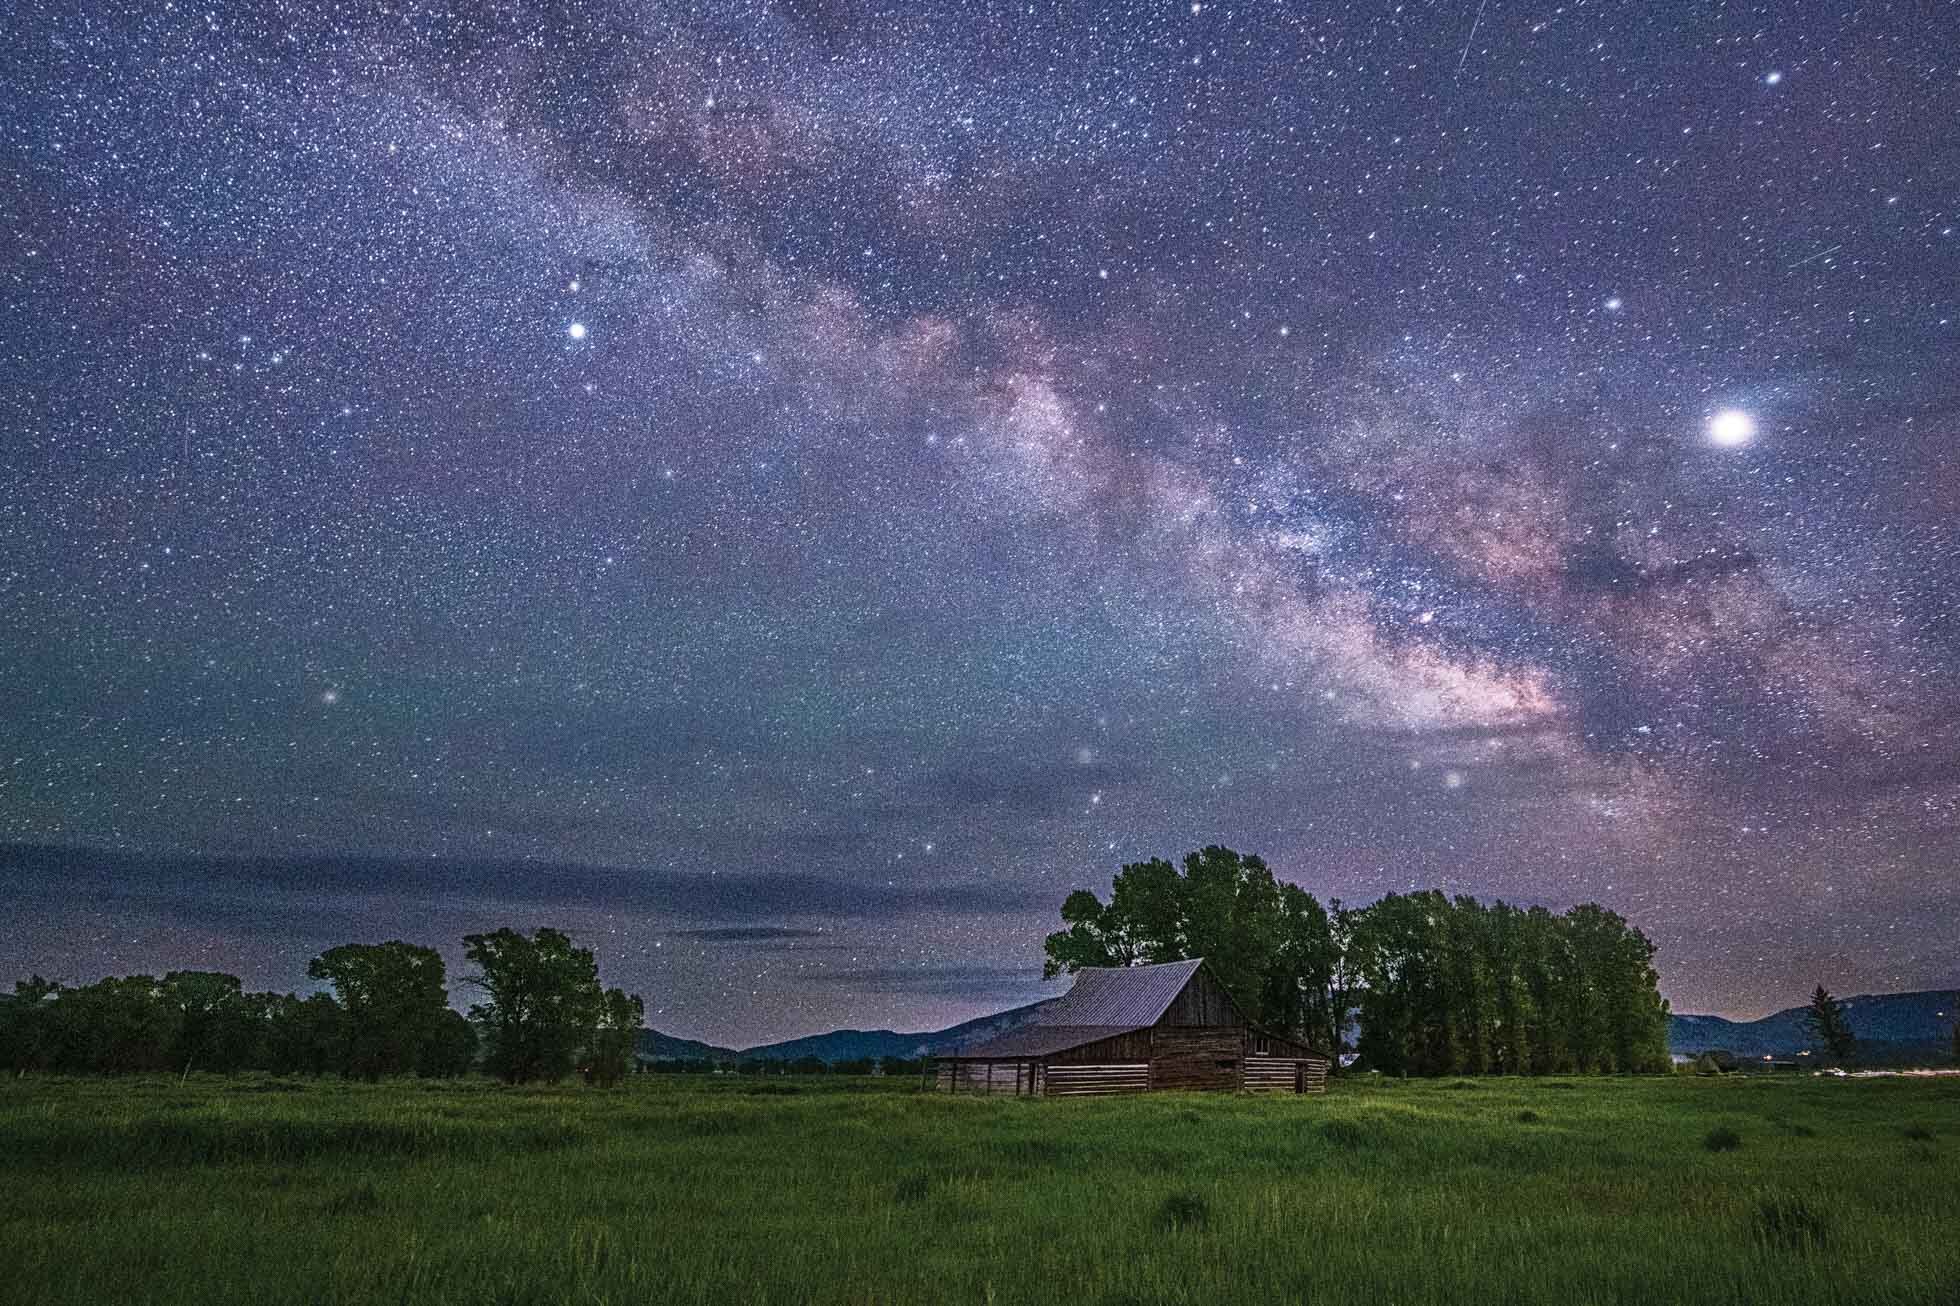


Night photography is one of my very favorite genres to shoot whenever I get the chance. And when I say Night Photography, I mean both Astrophotography and general night photography, such as night cityscapes, light trails, and other night scenes. Today’s tips for preparation apply to all areas of night photography. If you are looking for Astrophotography tips in particular you can visit my past blog posts: 9 Tips for Astrophotography Part 1 and 9 More Tips for Astrophotography Part 2. In this series, later posts will be focused on town & city scenes, light trails and star trails.

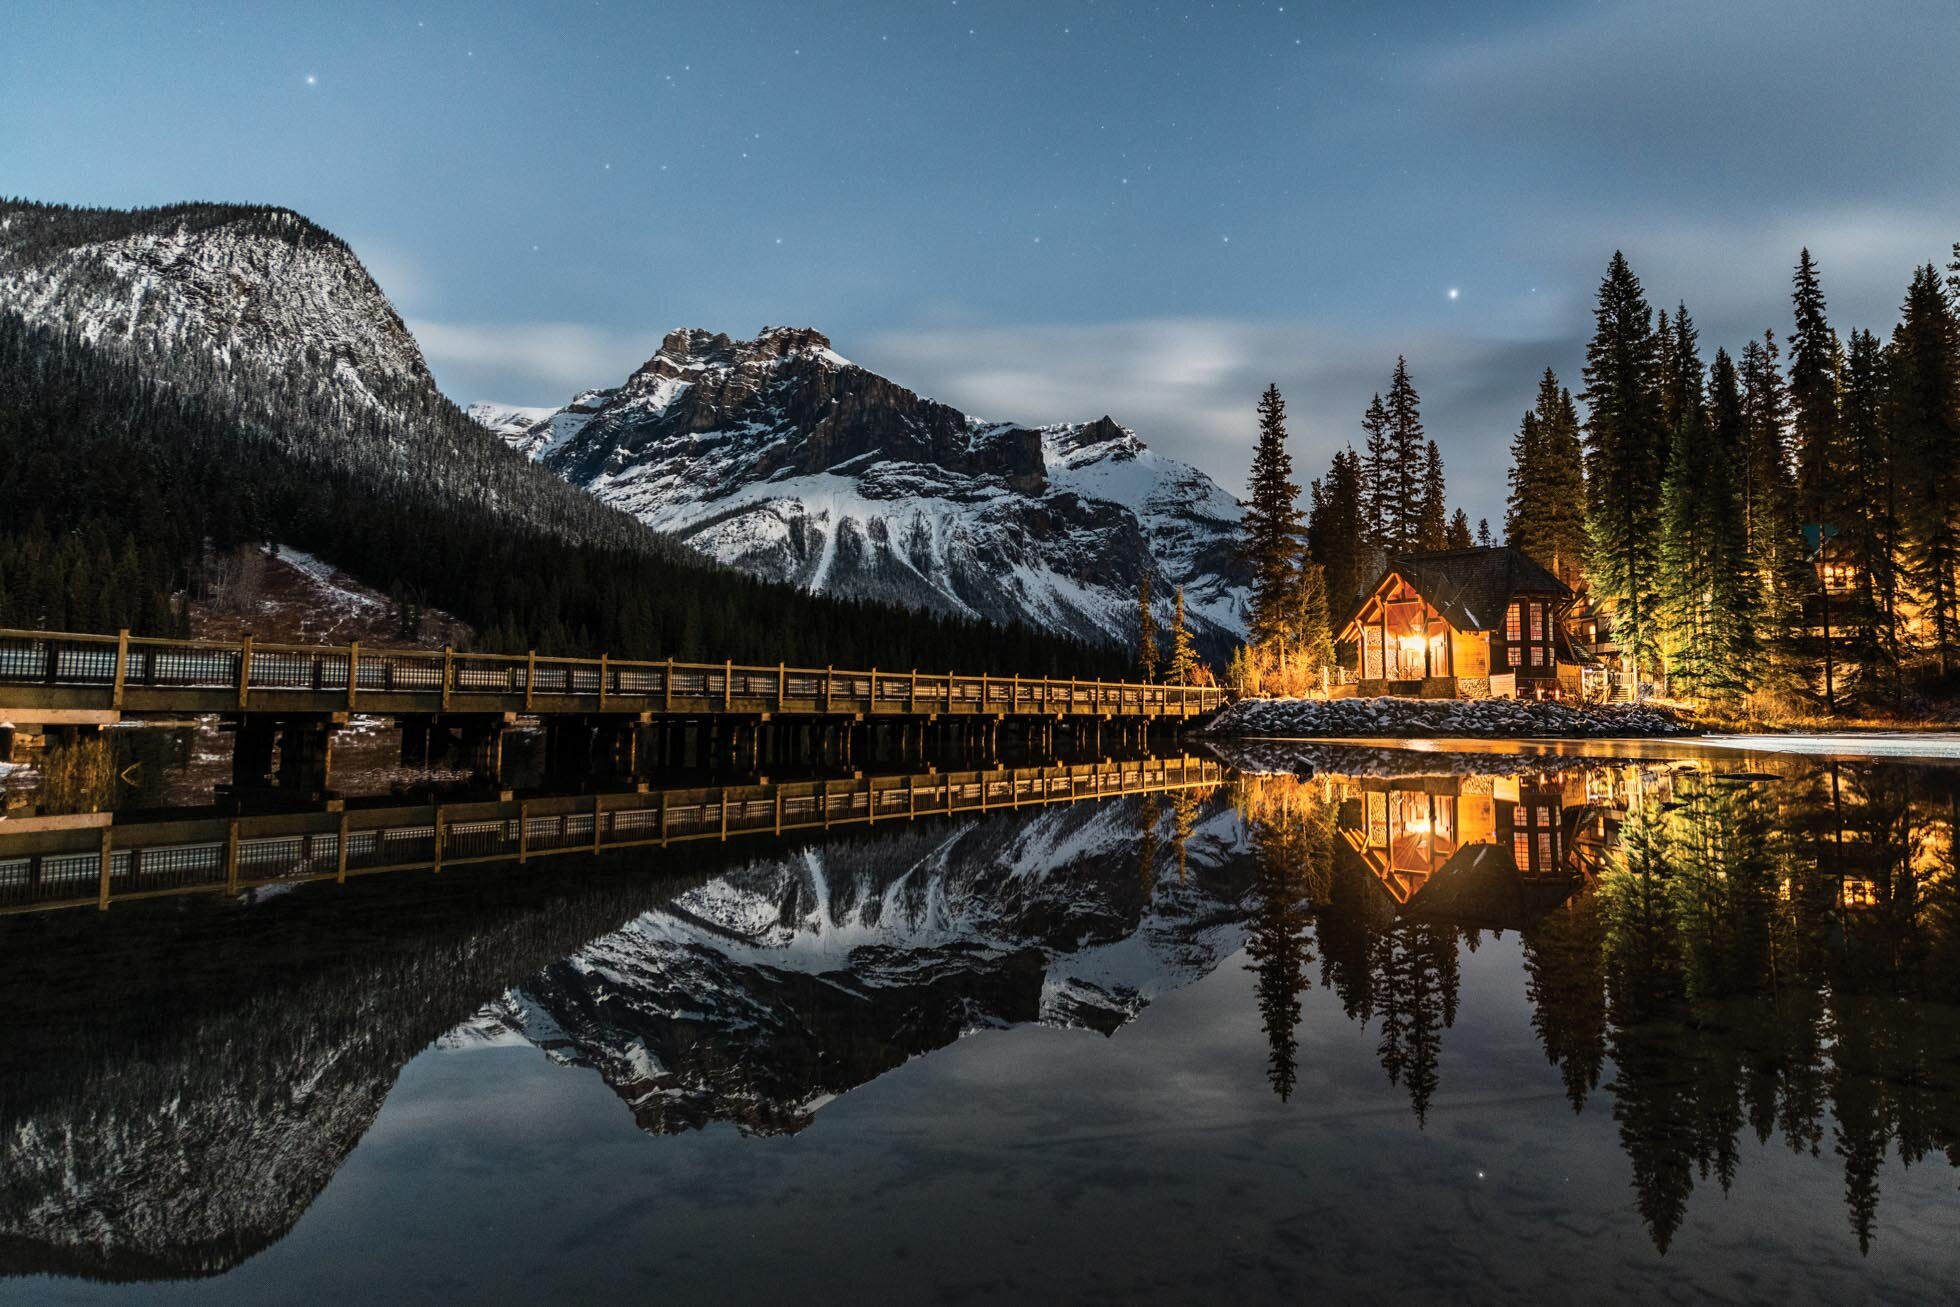
8 minute exposure of the stars over Mt. Rundle at Vermilion Lakes
I believe that preparation is key to enjoyable and successful night photography. Being prepared with the proper gear, knowing that gear and your location is the best first step toward creating amazing night imagery.
1 -Invest in a quality tripod - If you already shoot nightscapes even occasionally, you know that a tripod is critical to sharp night photography. The longer exposures you are shooting, the more important that the tripod is strong and sturdy so it won’t move if the conditions are windy. In addition to this, it is important to choose a tripod that is intuitive to you in its use. Being able to easily put the camera on the head and shift its position, especially in the dark is so important. If your tripod doesn’t feel easy for you to adjust, find one that is. It will take so much frustration out of working in the dark.
2) Pack Your Cable Release/Remote - When photographing long exposures, whether just 1-2 seconds or longer, a cable release will help eliminate any camera shake from pressing the shutter. Get to know your remote and how it works if you will be programming it for a time lapse or long exposure in bulb mode.
3) Bring a Headlamp and/or Flashlight - Depending on where you will be shooting, be sure to have a headlamp or flashlight to light your way and to help you work with your gear if you get stuck working in the dark. If you are shooting with other photographers, you’ll want to all get set up and try to avoid turning on any lights once you get shooting. Even a little light shining into the foreground can ruin a fellow photographer’s exposure.
4) Know Your Gear Well - Being able to work with your gear in the dark is so important for an enjoyable night shooting experience. If you can adjust your camera on your tripod and access the buttons you need on your camera without fumbling around, you’ll save yourself so much frustration. Know how to change your settings, playback and zoom in to check focus without having to turn on a flashlight. Spending a little time mindfully noticing where all these buttons are can make a world of difference.

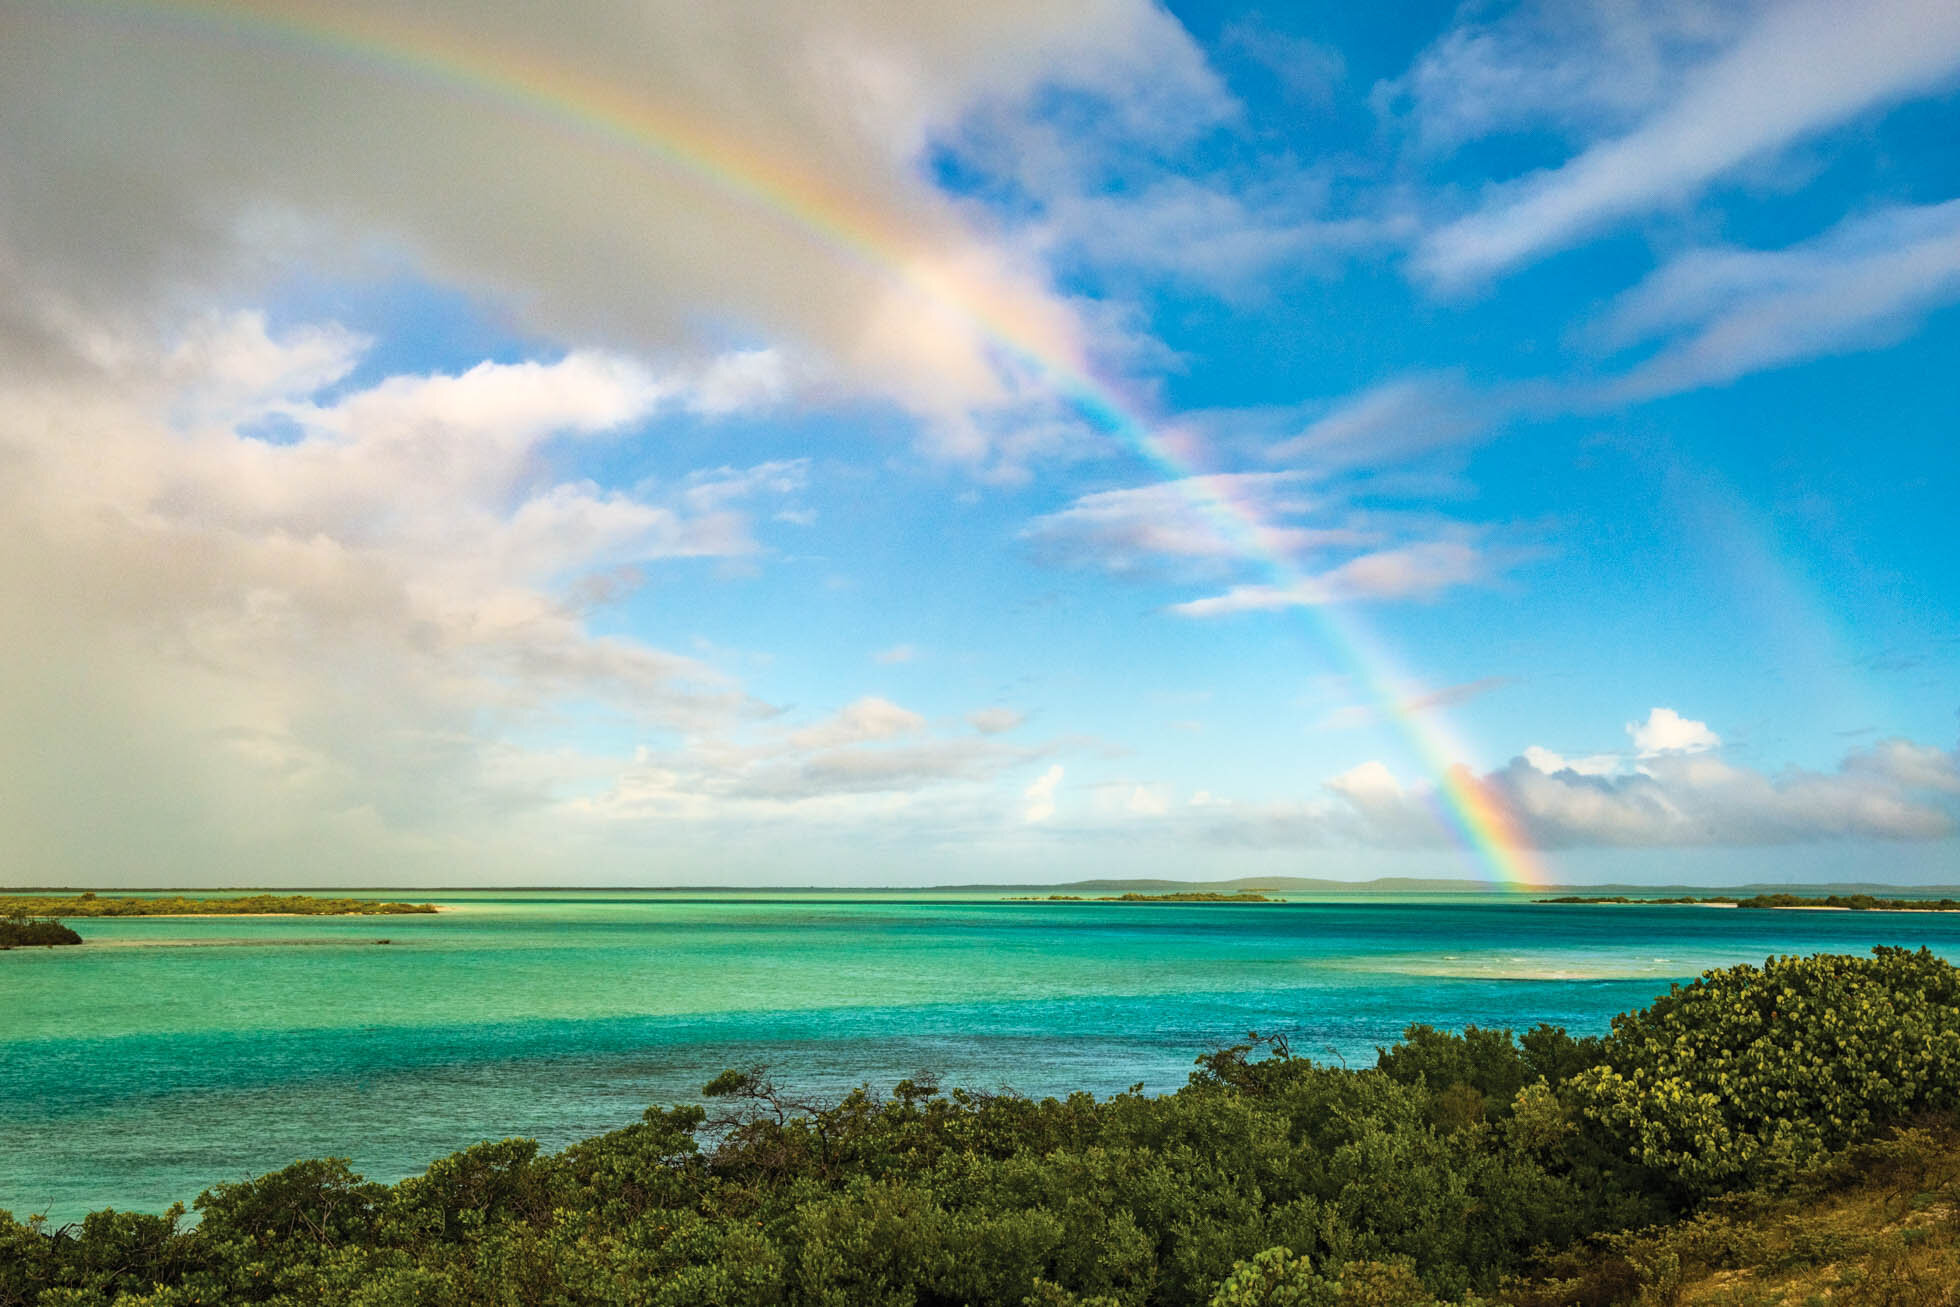
Harbour Town on Hilton Head Island as Blue Hour transitions to night.
5) Scout your location - Spend time during the day scouting out your location. Being able to see where you will be walking and setting up will help you when it is dark. Additionally, it can help to envision the composition you want to shoot in the daytime. Taking this time will create familiarity with the scene, minimize unexpected obstacles, and aid success in finding an intriguing composition.
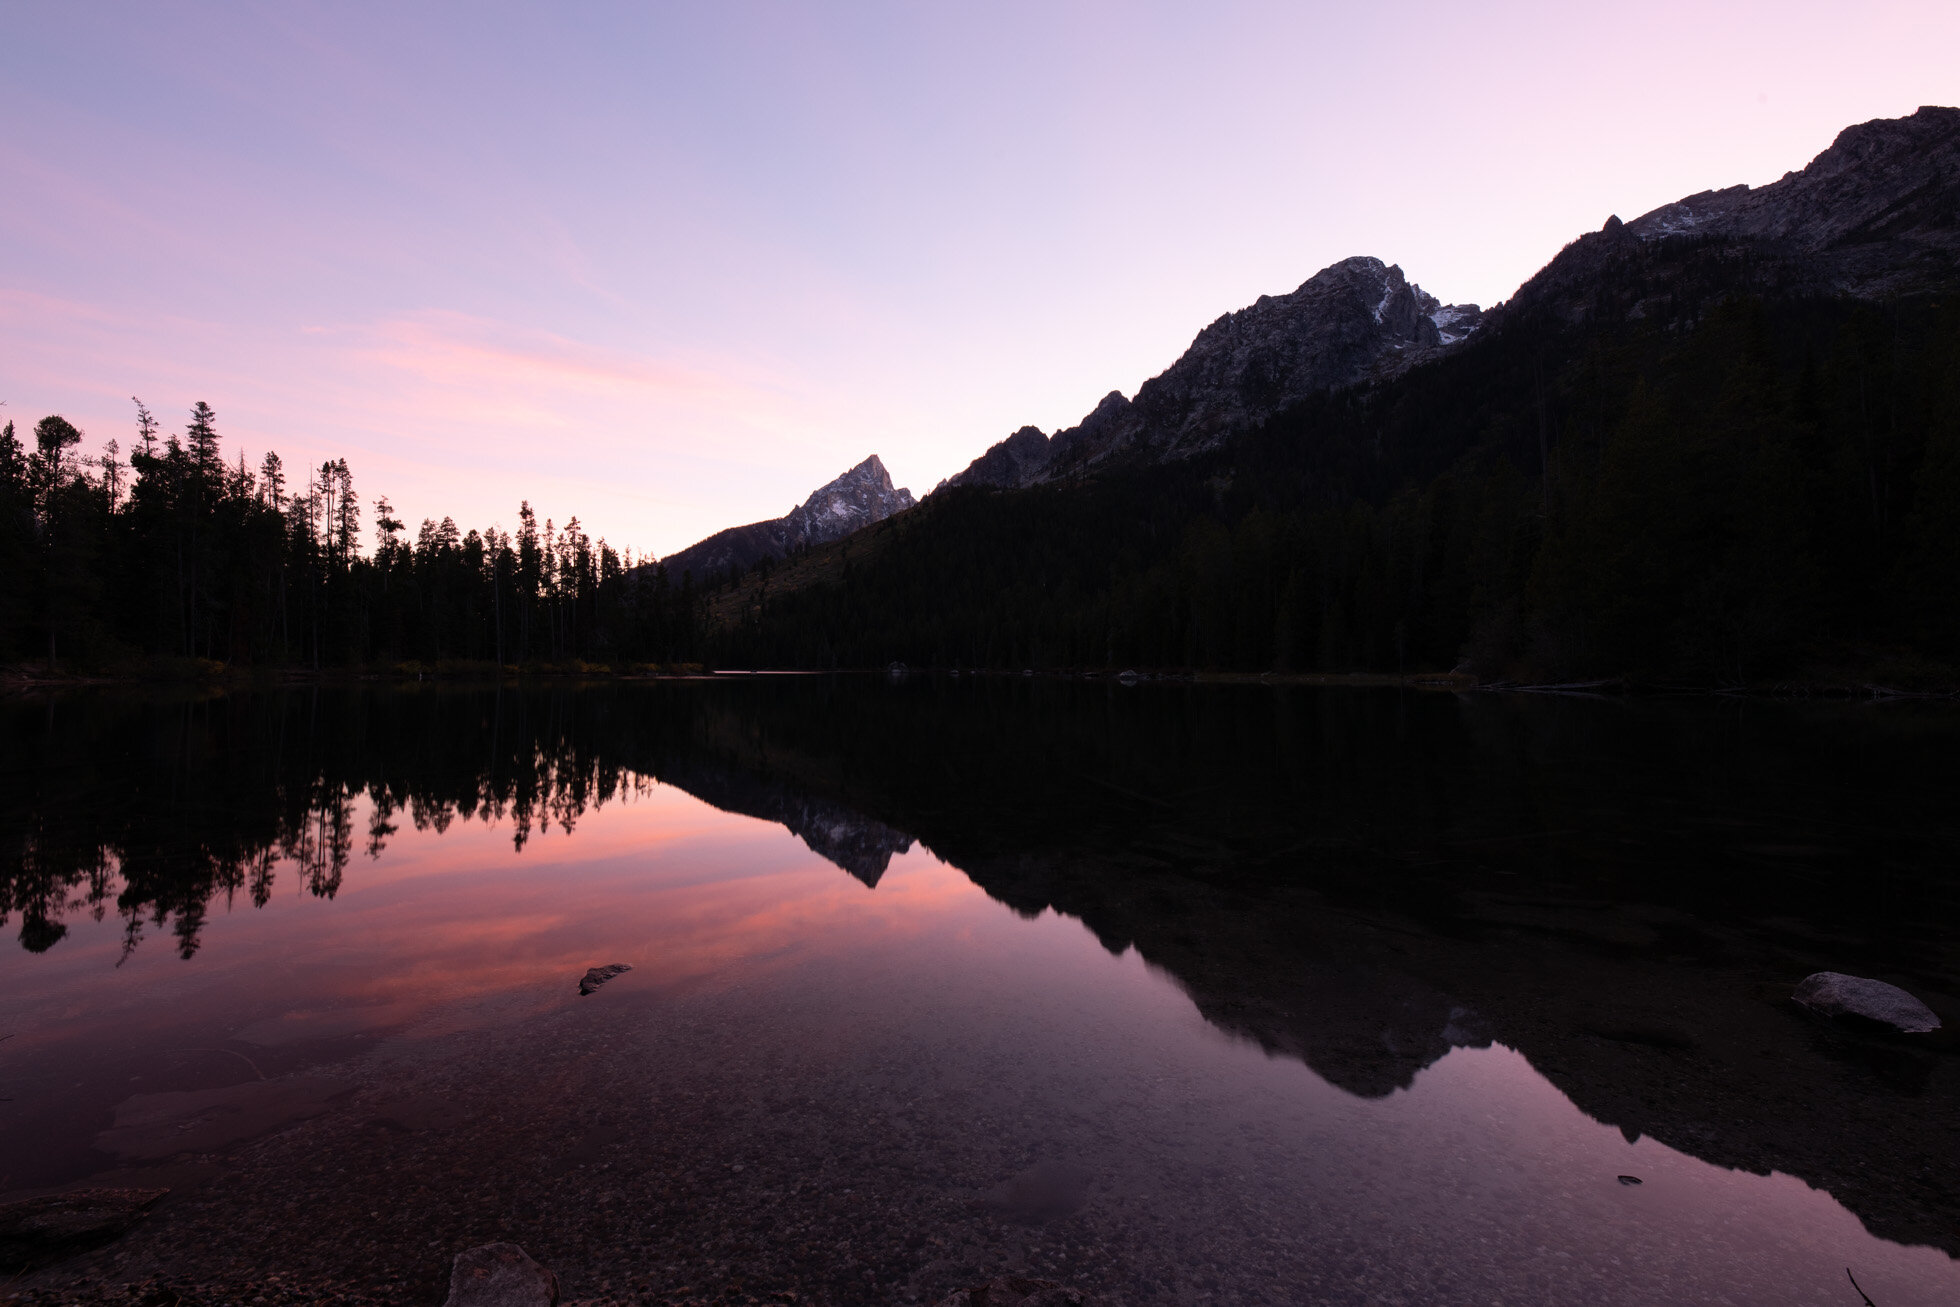
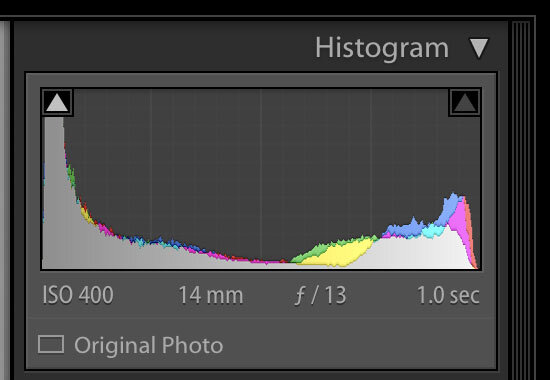
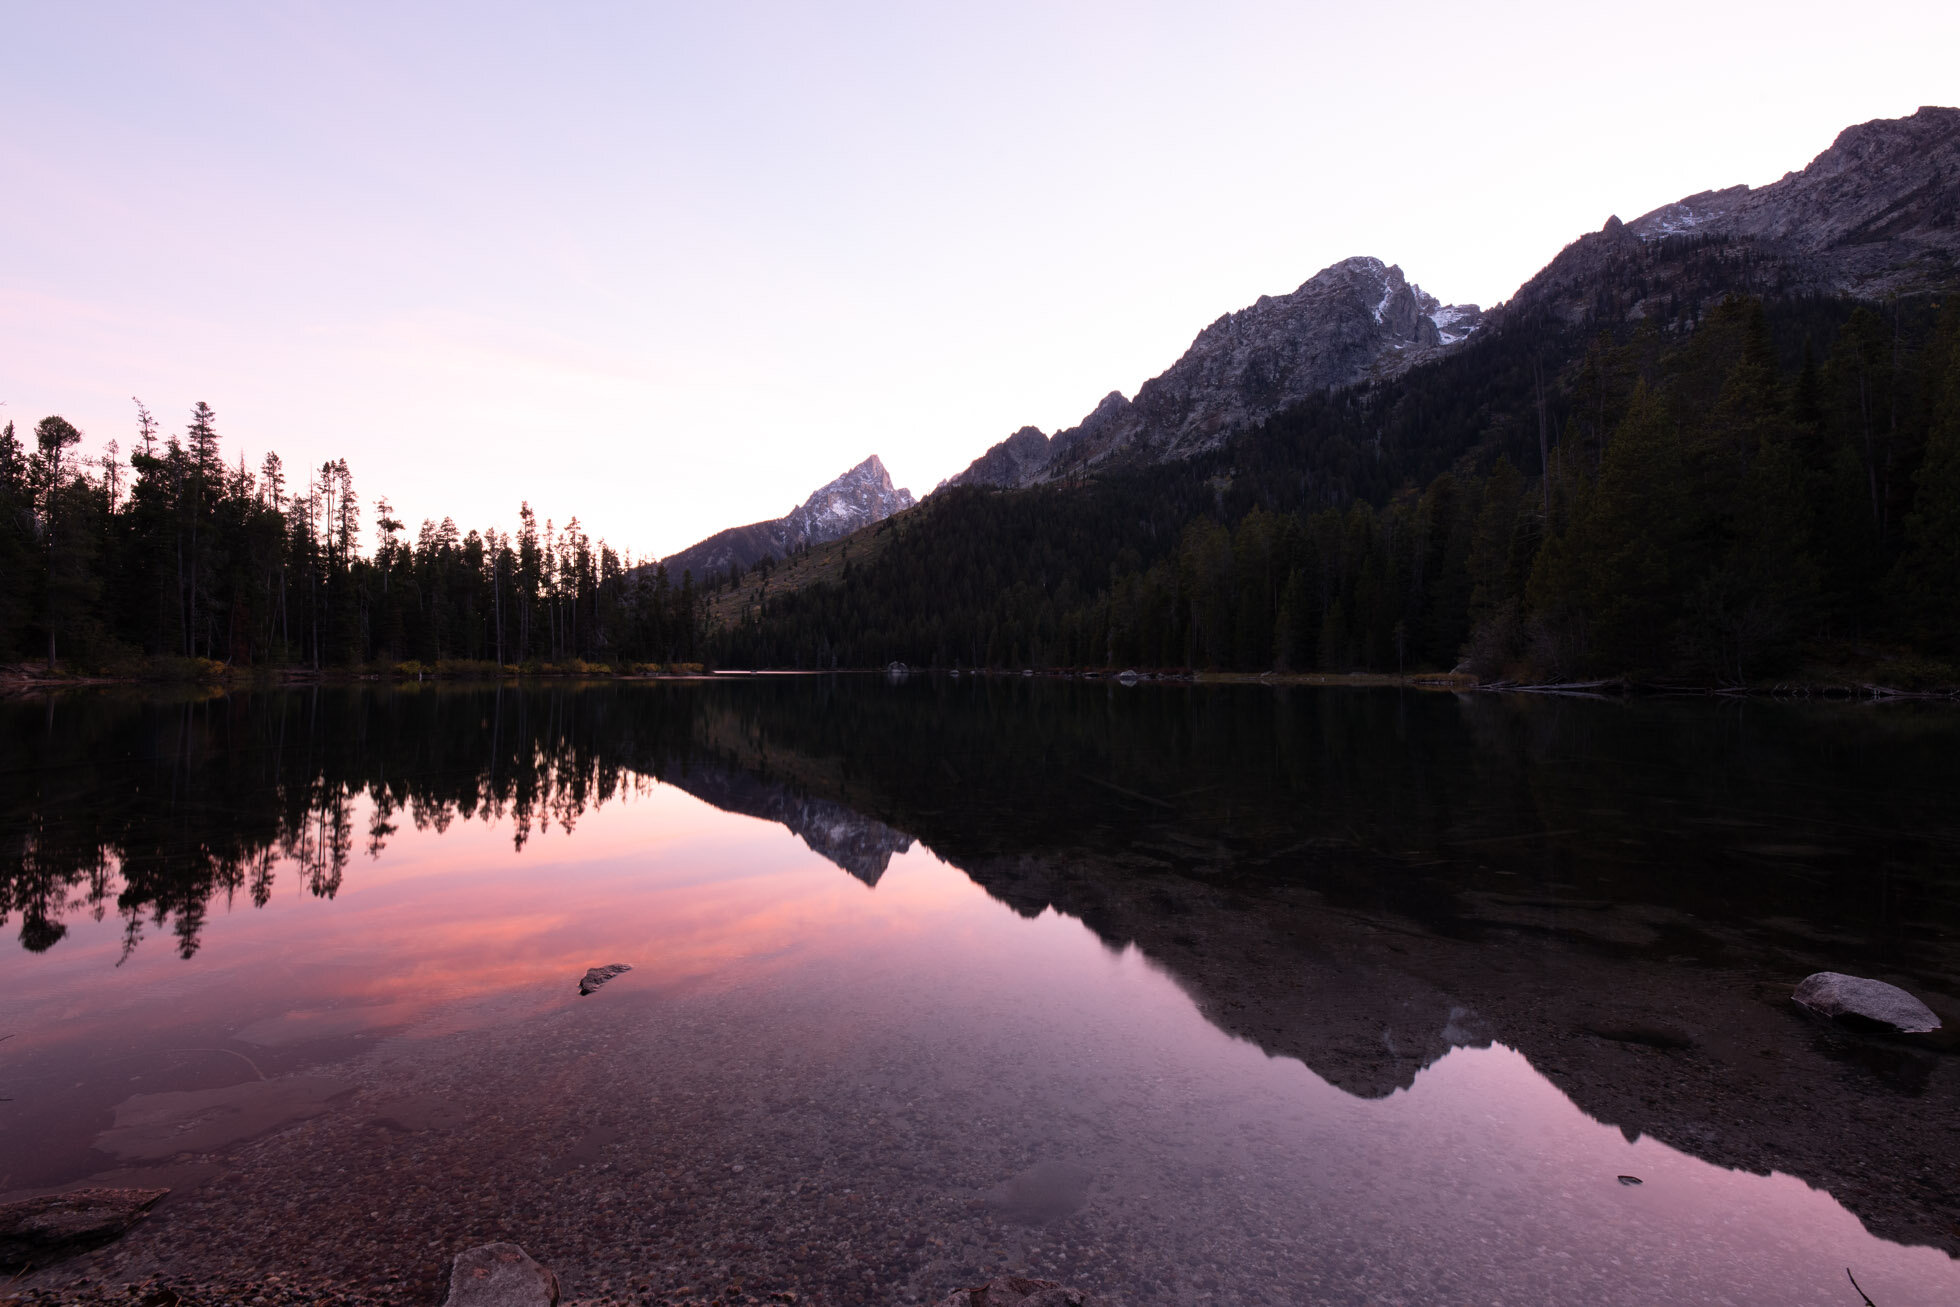
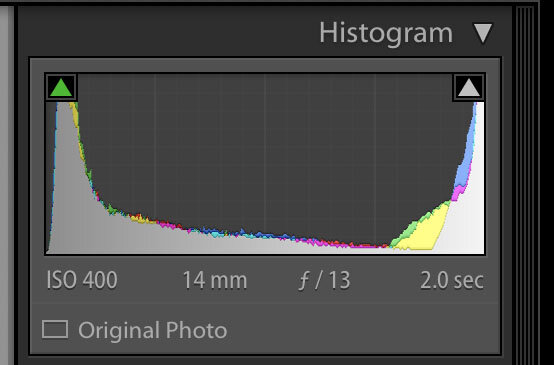
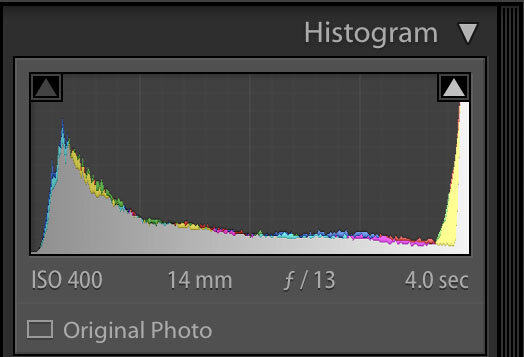
6) Lower Your Screen Brightness & Turn on your Highlight Blinkies - One of the most frequent difficulties with night photography is underexposed images. It is easy to look at your LCD screen on playback and think your image is well exposed when in reality is it underexposed. Lowering the screen brightness is helpful in preventing this mistake. Checking the histogram for proper exposure is the second important step. Using the highlight blinkies on your LCD is another helpful tool to use to ensure the brightest areas of your night scene (e.g. stars, city lights, etc) are not blown out. Check your camera manual to learn how to turn down the brightness and enable the highlight warnings.
7) Prepare for the Elements - Depending on where you are shooting you may run into various weather conditions. In the summer months, some areas could get buggy at night so you may want to have bug spray on hand. In cooler months, and even in some climates, such as the mountains, the night temperatures get far cooler than the days. Be prepared with layers to keep yourself warm. If you will be in wet areas, waterproof shoes might be helpful, or hiking boots for slippery and uneven terrain.
8) Be safe - In the city or the wilderness, night time has its dangers. In both cases, it is important to be safe by being aware of your surroundings and it is always best to have a friend for shooting partner with you.

Chicago River at Night
Night Photography Part 2 coming next week!
Kristen Ryan is an award winning and published landscape and fine art photographer and educator residing in the Midwest suburbs of Chicago. All images are available for purchase in the Fine Art Store or by request. Kristen leads ladies landscape photography retreats in the Tetons, Chicago, and the Canadian Rockies, offers private mentoring and teaches an online landscape photography workshop, The World Around You. The next run of The World Around You begins August 17!